

Let’s start by recognizing that I’m not a gardening expert. I’m actually fairly clueless. A baby gardener. And I’m playing. (Yes, John, this is what I do for fun…!) Because (as That One keeps reminding me) playing is how we mammals learn. This doesn’t mean I’m not absolutely serious about learning to produce my own food – just like kittens are absolutely serious about learning to hunt and climb and hide and defend themselves. (Also sleeping – because serious playing can wear you right out!) I’ve been reading books and asking questions and looking things up online – and there’s definitely physical work involved – but mostly I’m playing. Experimenting. Trying different things to see what happens. The whole process feels whimsical and random and often fairly sweaty and muddy. And (except for the insanity of trying to keep free range creatures out of baby plants) Fun!
A couple of weeks ago I was on the ‘phone with my Auntie Pat talking (of course) about gardening. She’d come out of the the house that morning to discover that the deer had eaten all her pansies – right out of her window boxes! I had just eaten my first baby greens from the salad pallet garden (careful not to disturb the resident fire ants!) and was over the top excited about how well this particular experiment had worked. One thing led to another and here I am (per her special request) attempting a tutorial blog post with photos. In the realm of writing this feels like playing (learning) as well – so here goes!
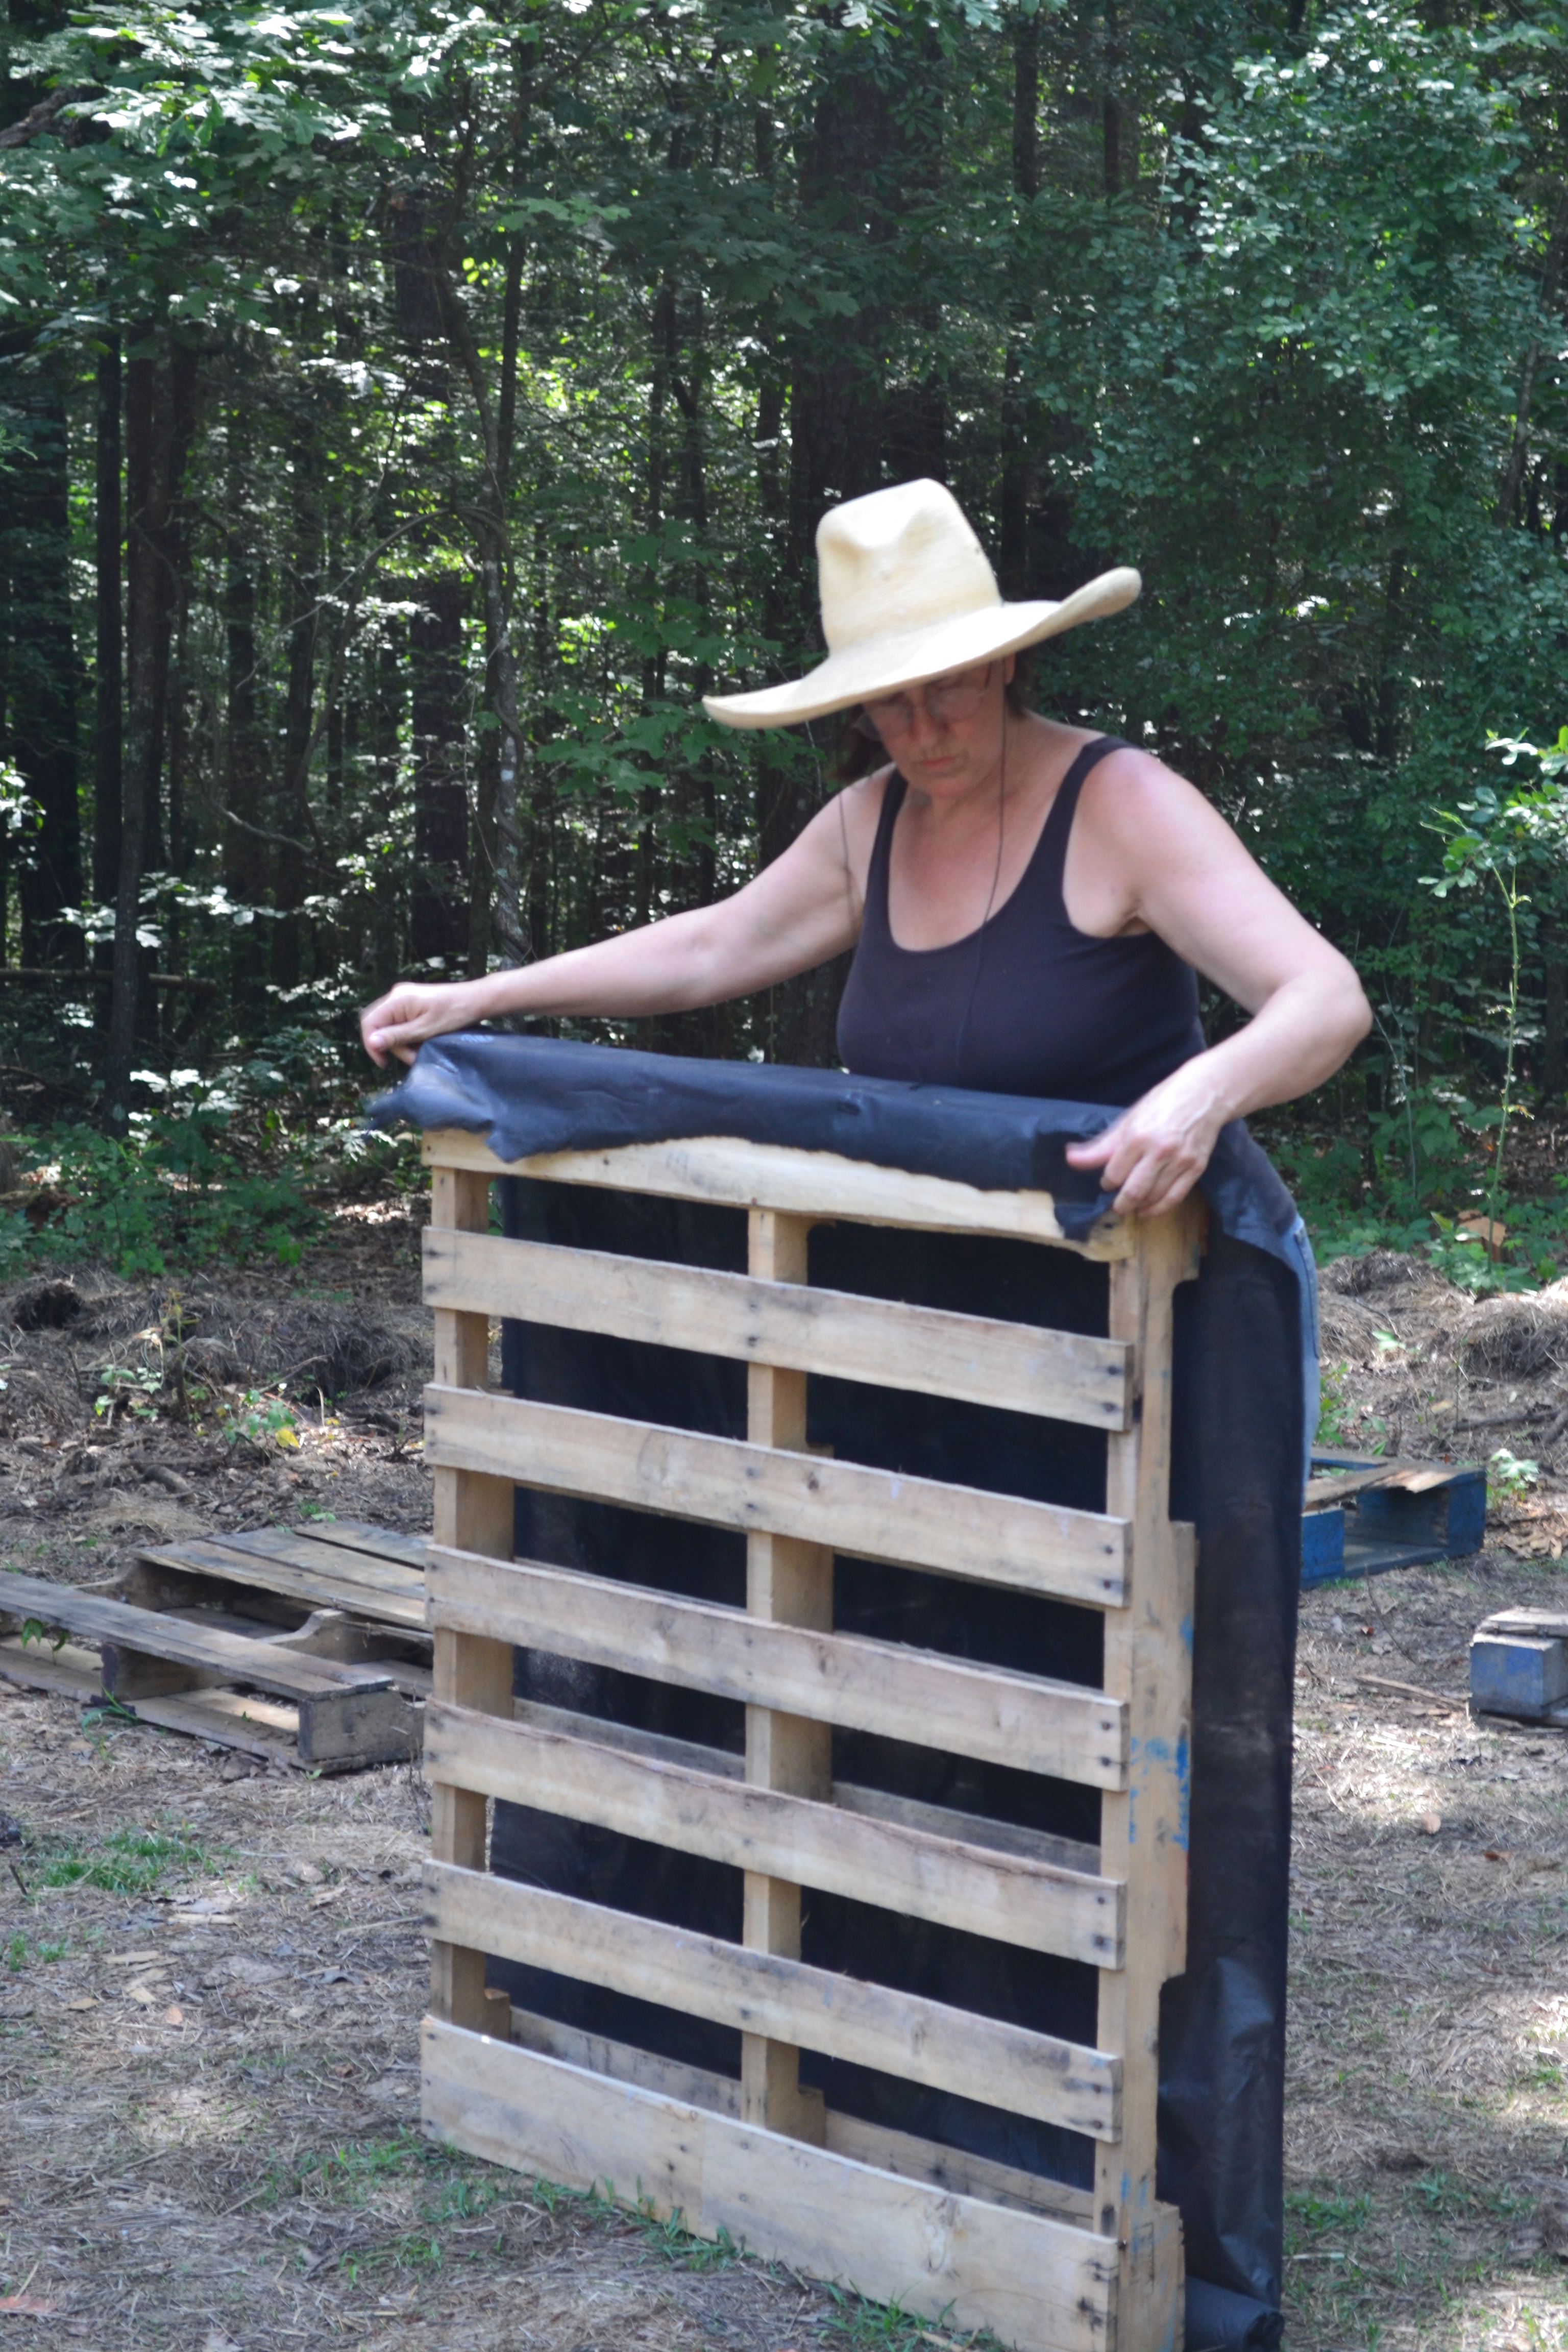
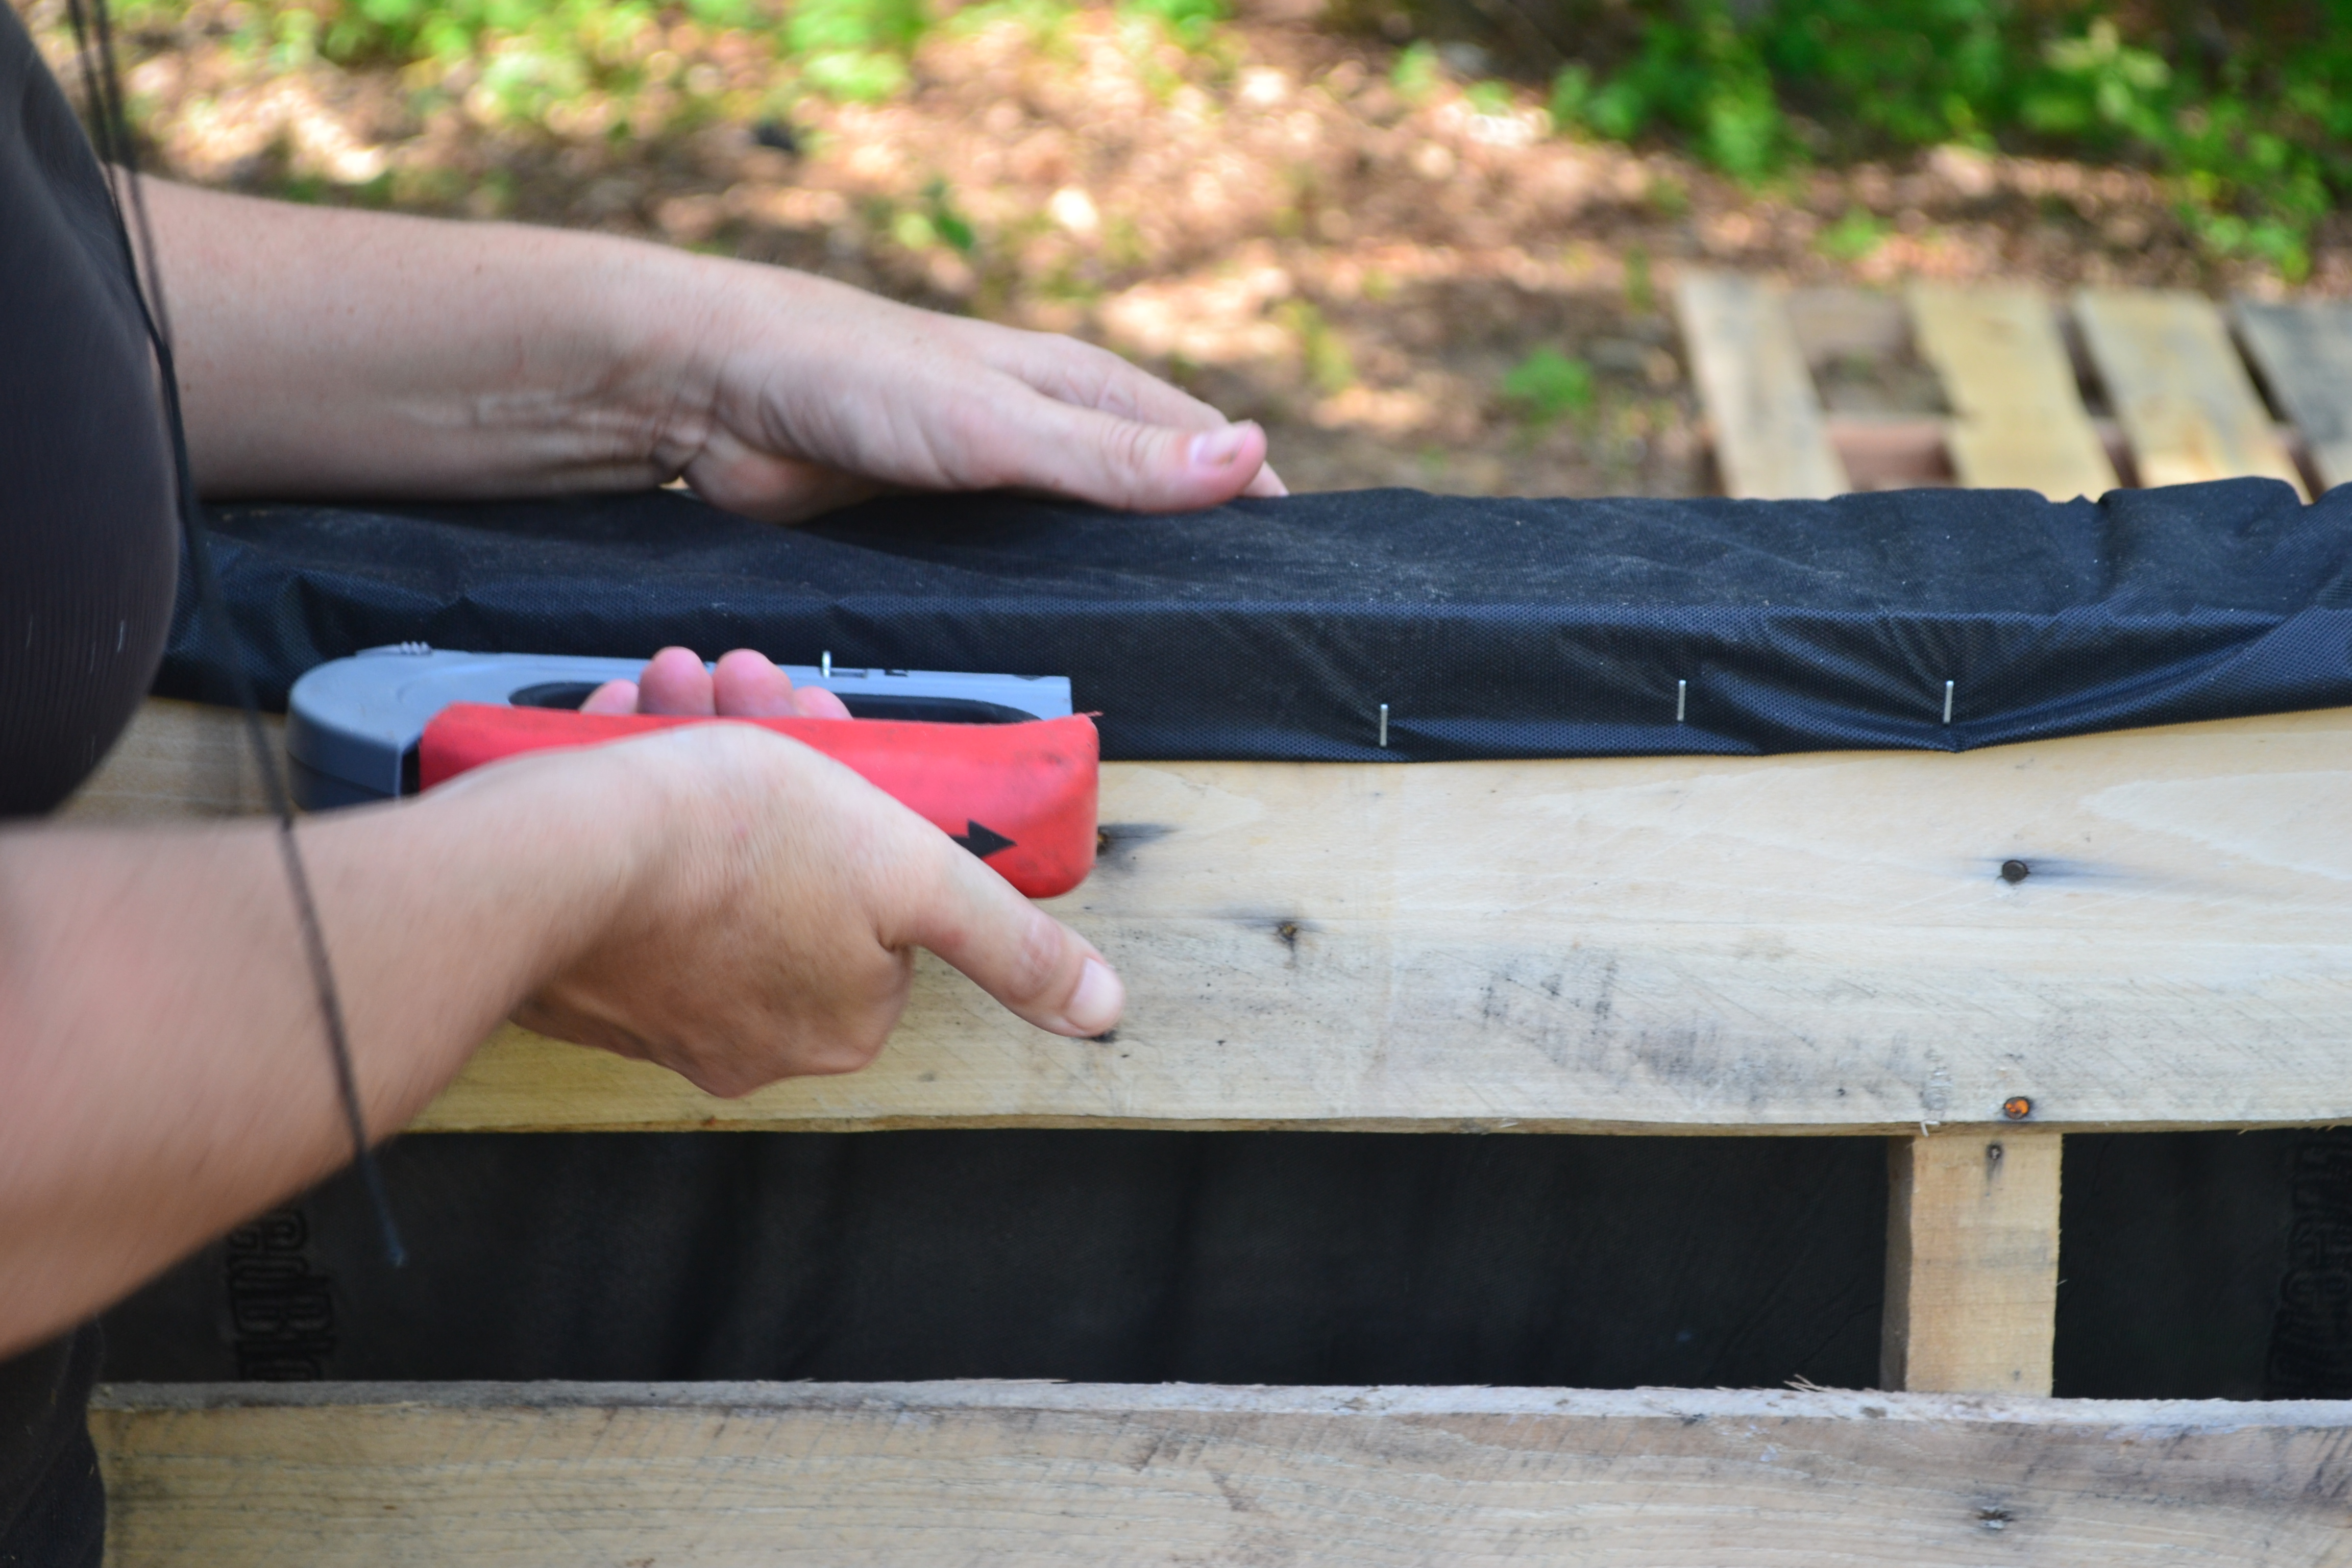
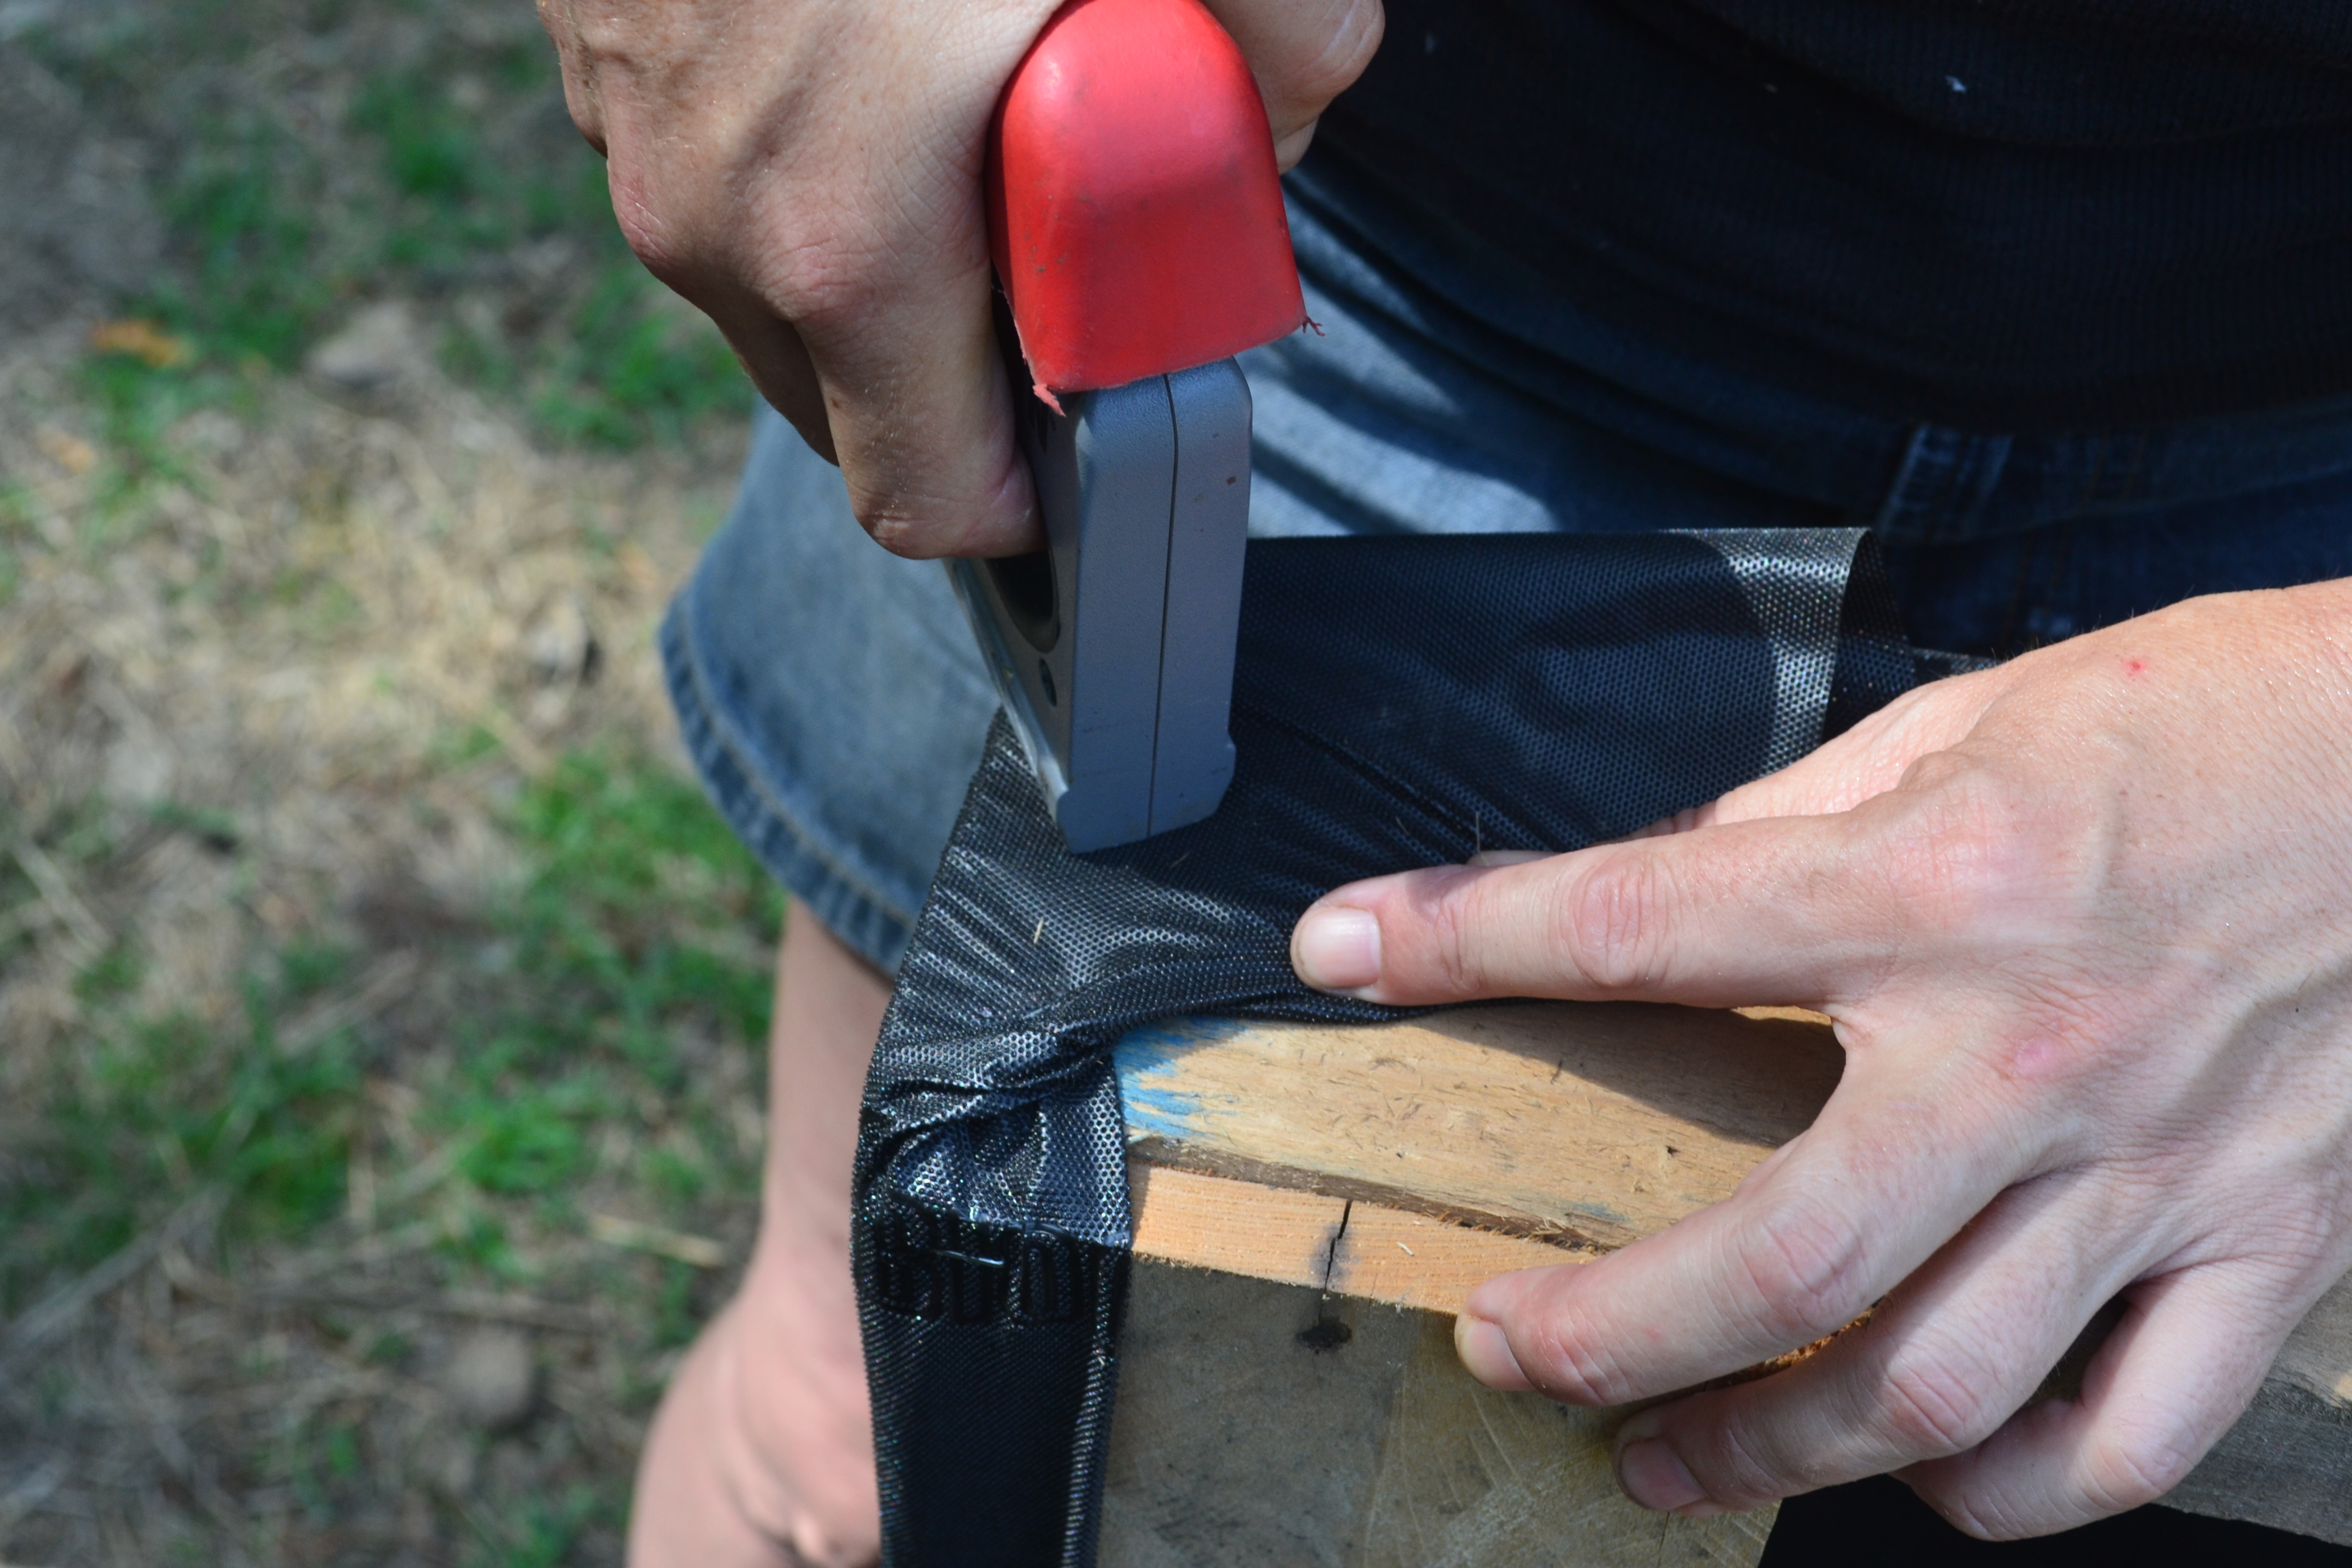
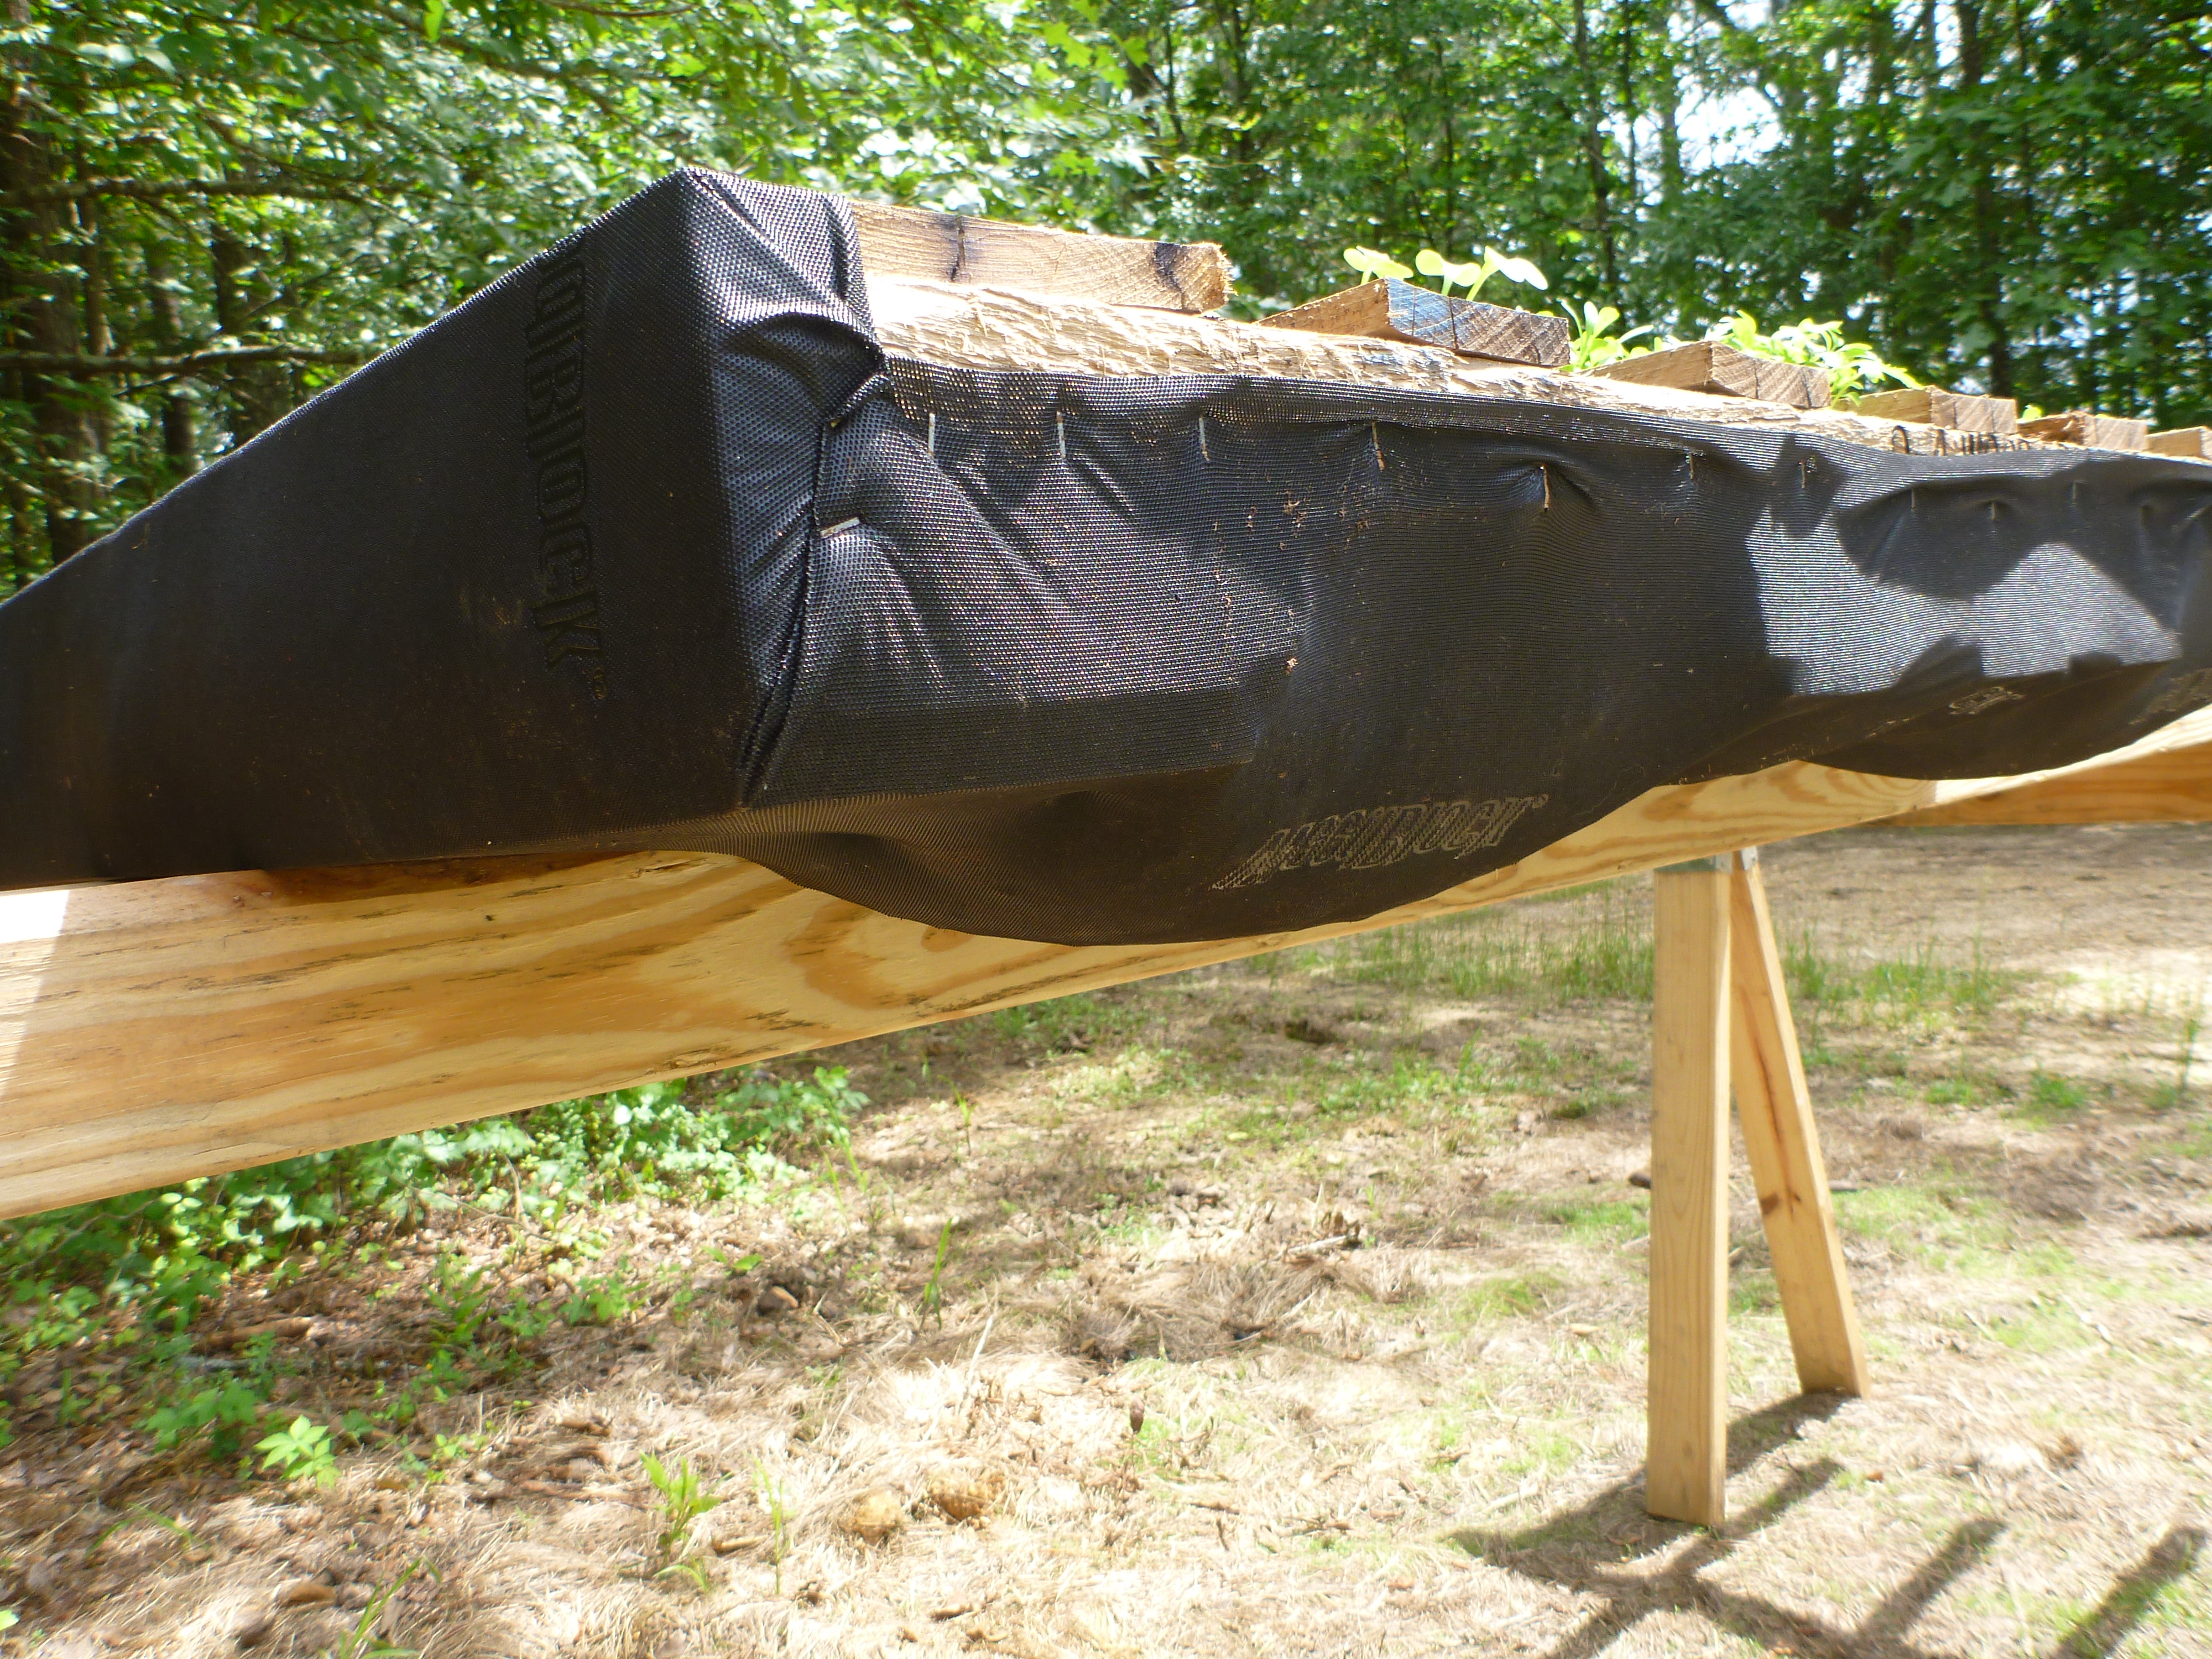
The first step is to procure a pallet. Ideally one that’s clean and intact, tho if you’re going to put it on the ground and not move it a few missing boards on the bottom won’t be a problem. Also landscaping cloth (or some other strong and permeable fabric – my hunch is that denim would work fine, plastic not so much) and a staple gun (or hammer and short big-head nails, or tacks and your thumb – whatever works). The objective here is to trap dirt inside the pallet – but not extra water. I started out on the “solid” ends of the pallet – centering the fabric and stretching it fairly tight. I folded the fabric over and stapled through two layers, like making a hem in sewing. I’m assuming that step will make the attachment stronger – and it looks tidier, if that matters to you.
Then I did some version of a hospital corner (hah!) and stapled down each side.

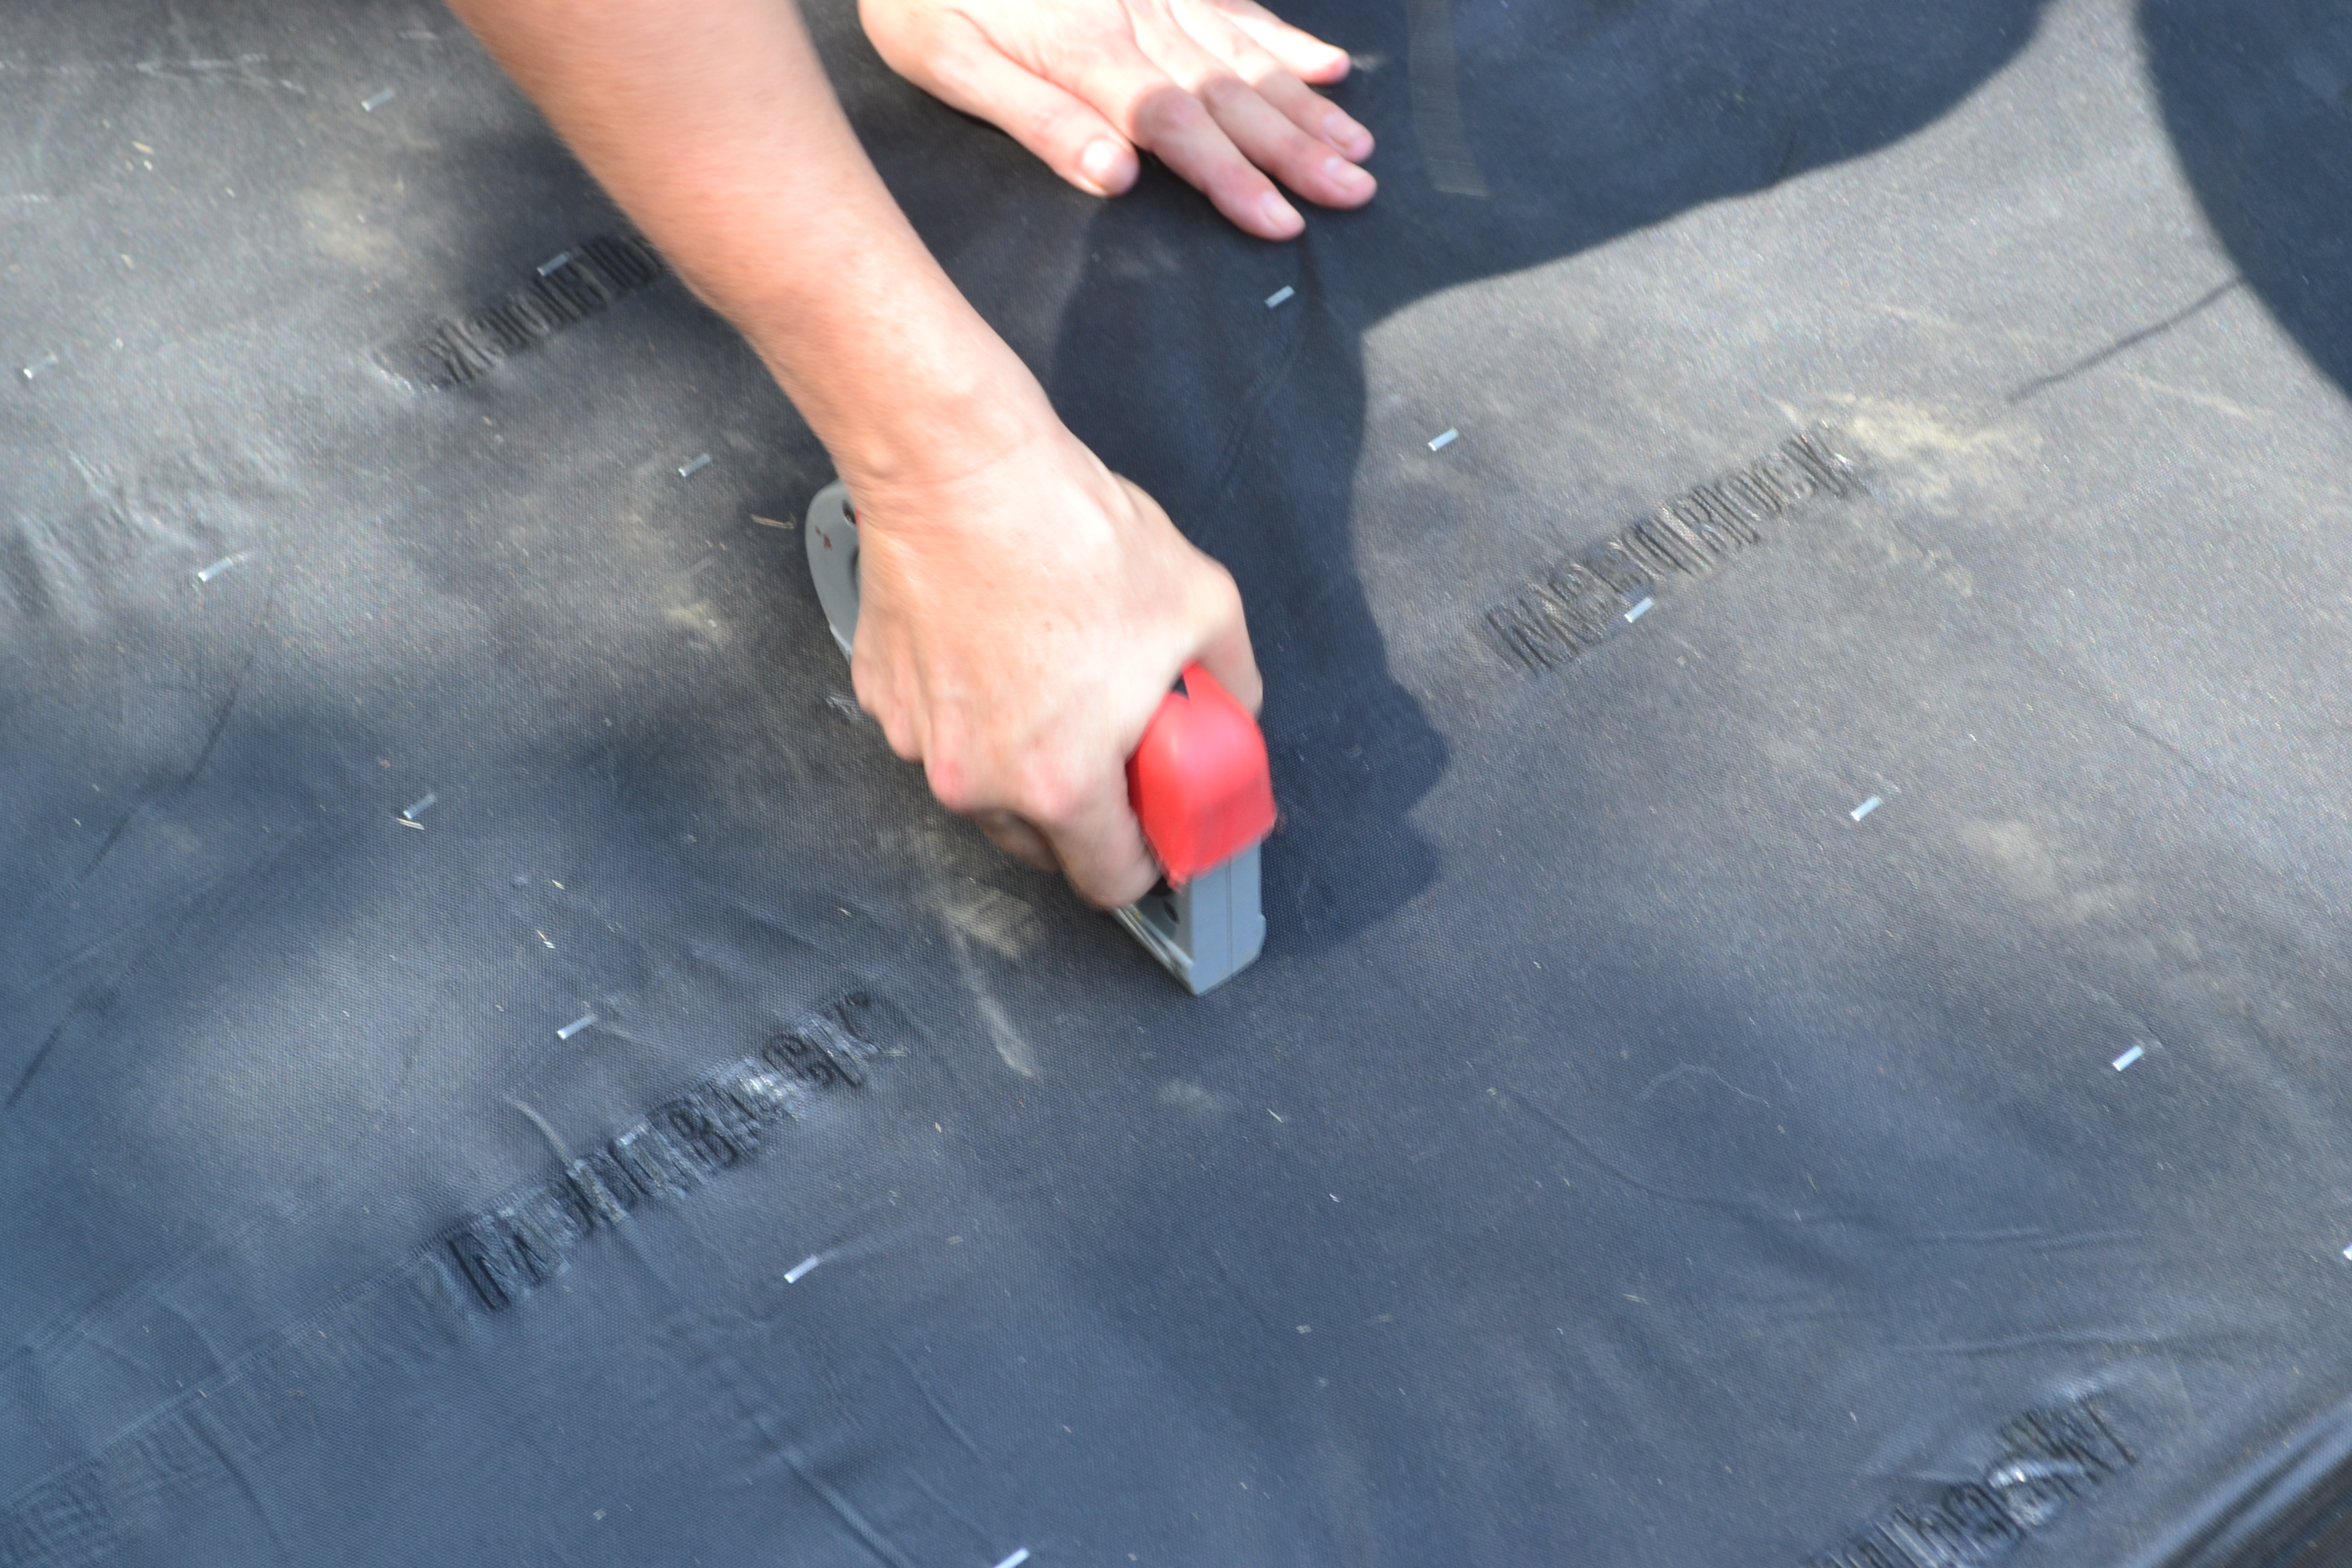
And then I flipped the pallet up-side down and stapled along the underside boards to try and help hold the dirt in – because this pallet is not going to stay on the ground. I didn’t skimp on the staples!

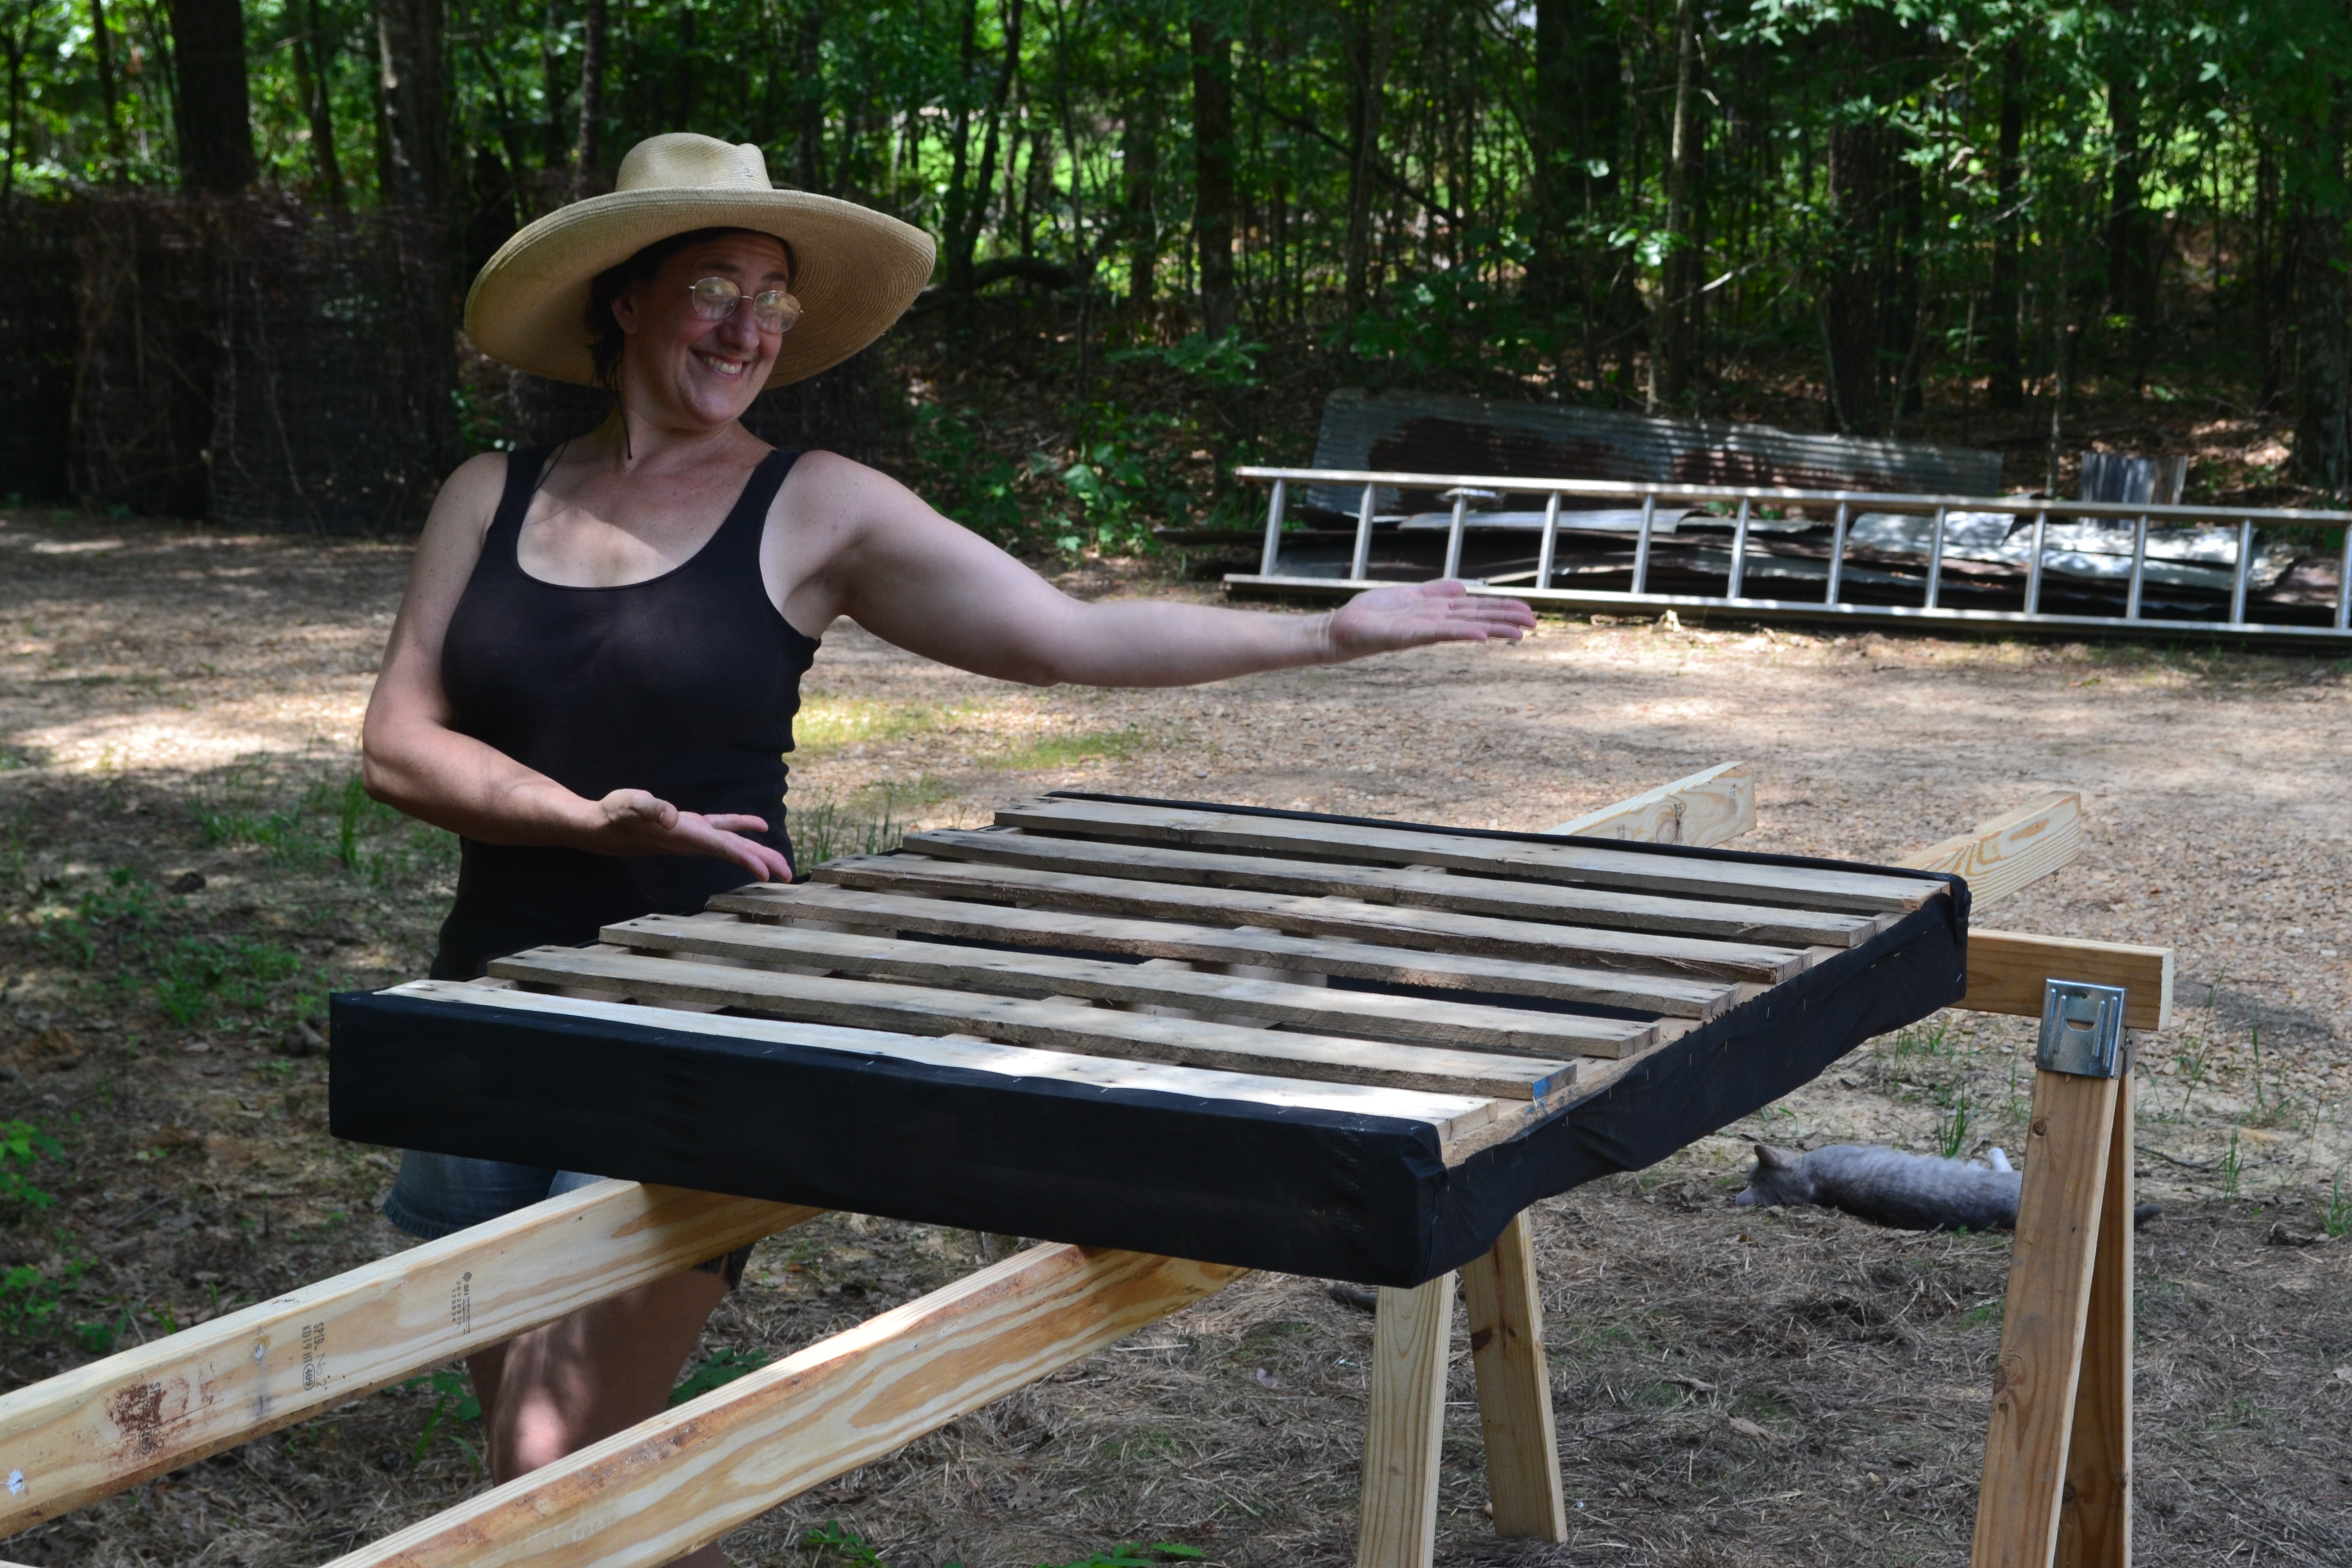
Meanwhile, Saint George (along with taking photos) was constructing a pair of sawhorses. The first time I tried planting a pallet the fire ants moved in and colonized a corner of the pallet and the chickens came by and scratched and pecked a bit. Neither of these events were catastrophic, but why repeat mistakes? So up it goes. It’s also easier to tend and harvest a waist-high garden. The sort of deer who eat pansies out of window boxes will probably appreciate a tasty smorgasbord laid out at a convenient browsing height, but discouraging that sort of behavior is what dogs are for – right? Et Voila – the pallet on the saw horses (with room for two more – the supporting 2″x4″s are 12 feet long in this case).
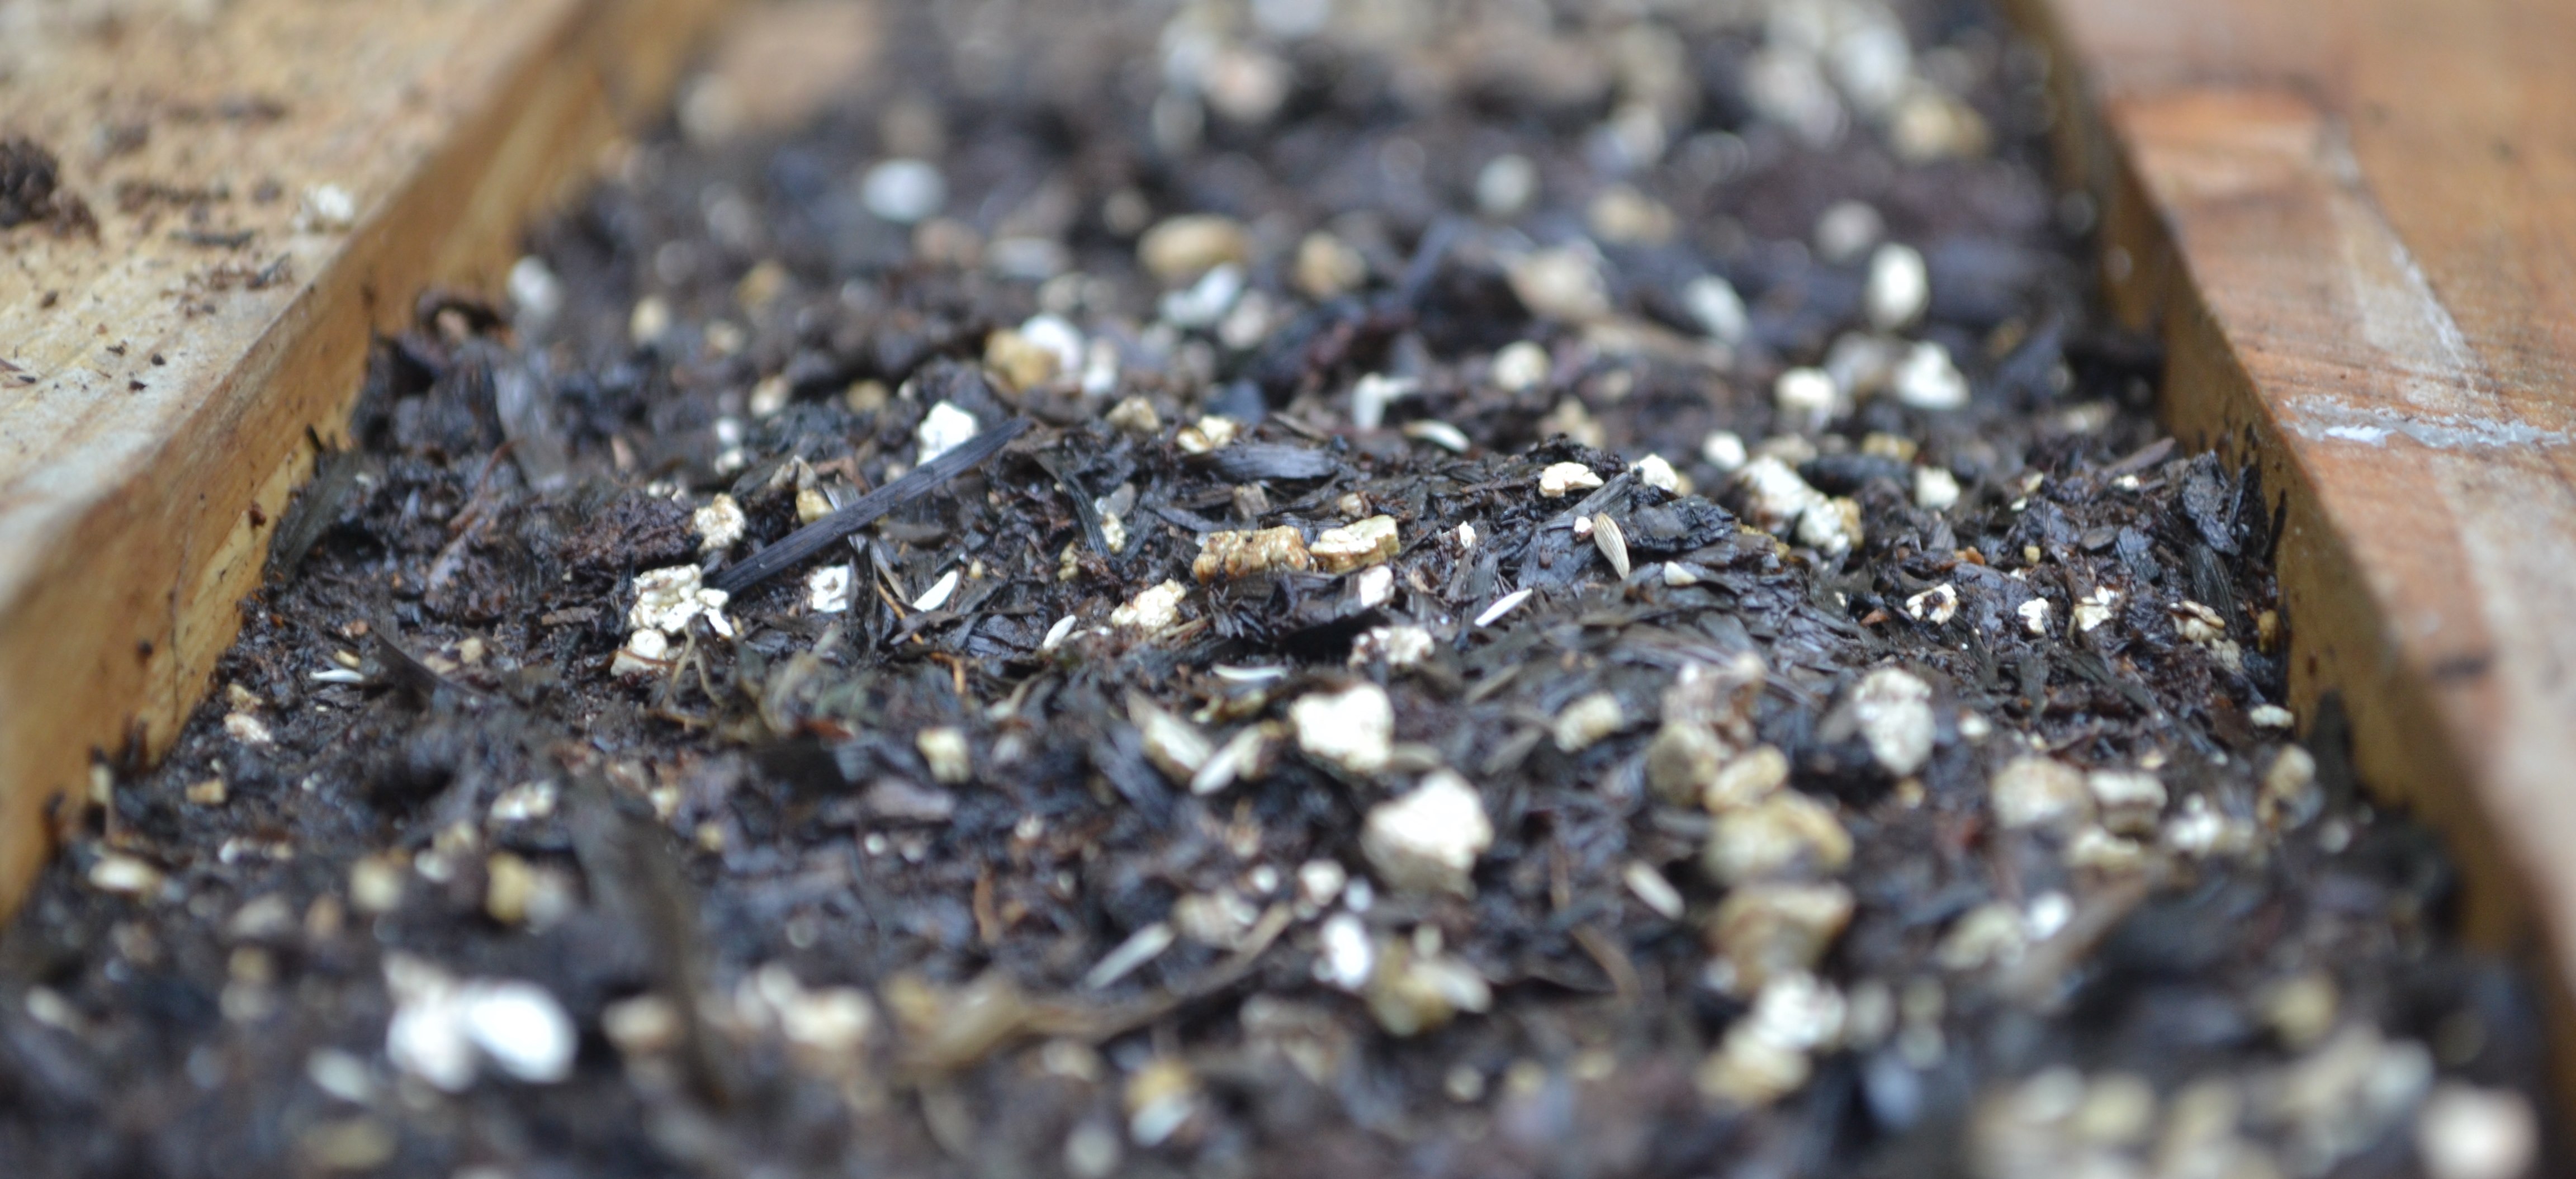
And now it’s time for the dirt – aka the “growing medium”. Remember, I’m still in the trial and error phase and there’s plenty of room for improvisation. I rarely do the same thing the same way twice – so this is just what I did this time: the basic “recipe”. I cribbed most of this from Mel Bartholomew’s Square Foot Gardening book (to give credit where credit it due) and then altered it to suit my circumstances (cuz that’s life!) In roughly equal amounts I mixed vermiculite, peat moss, “black cow” boughten compost and “real” (ie, dug out of an old cow barn) compost. Vermiculite is mica, heated ’til it explodes (pop rocks!) Both the vermiculite and the peat help hold moisture and keep the soil loose (friable) so the roots of the plants can grow freely and get what they need from the compost. In an ideal world compost has at Least 5 different things decomposing in the mix – maybe next year!
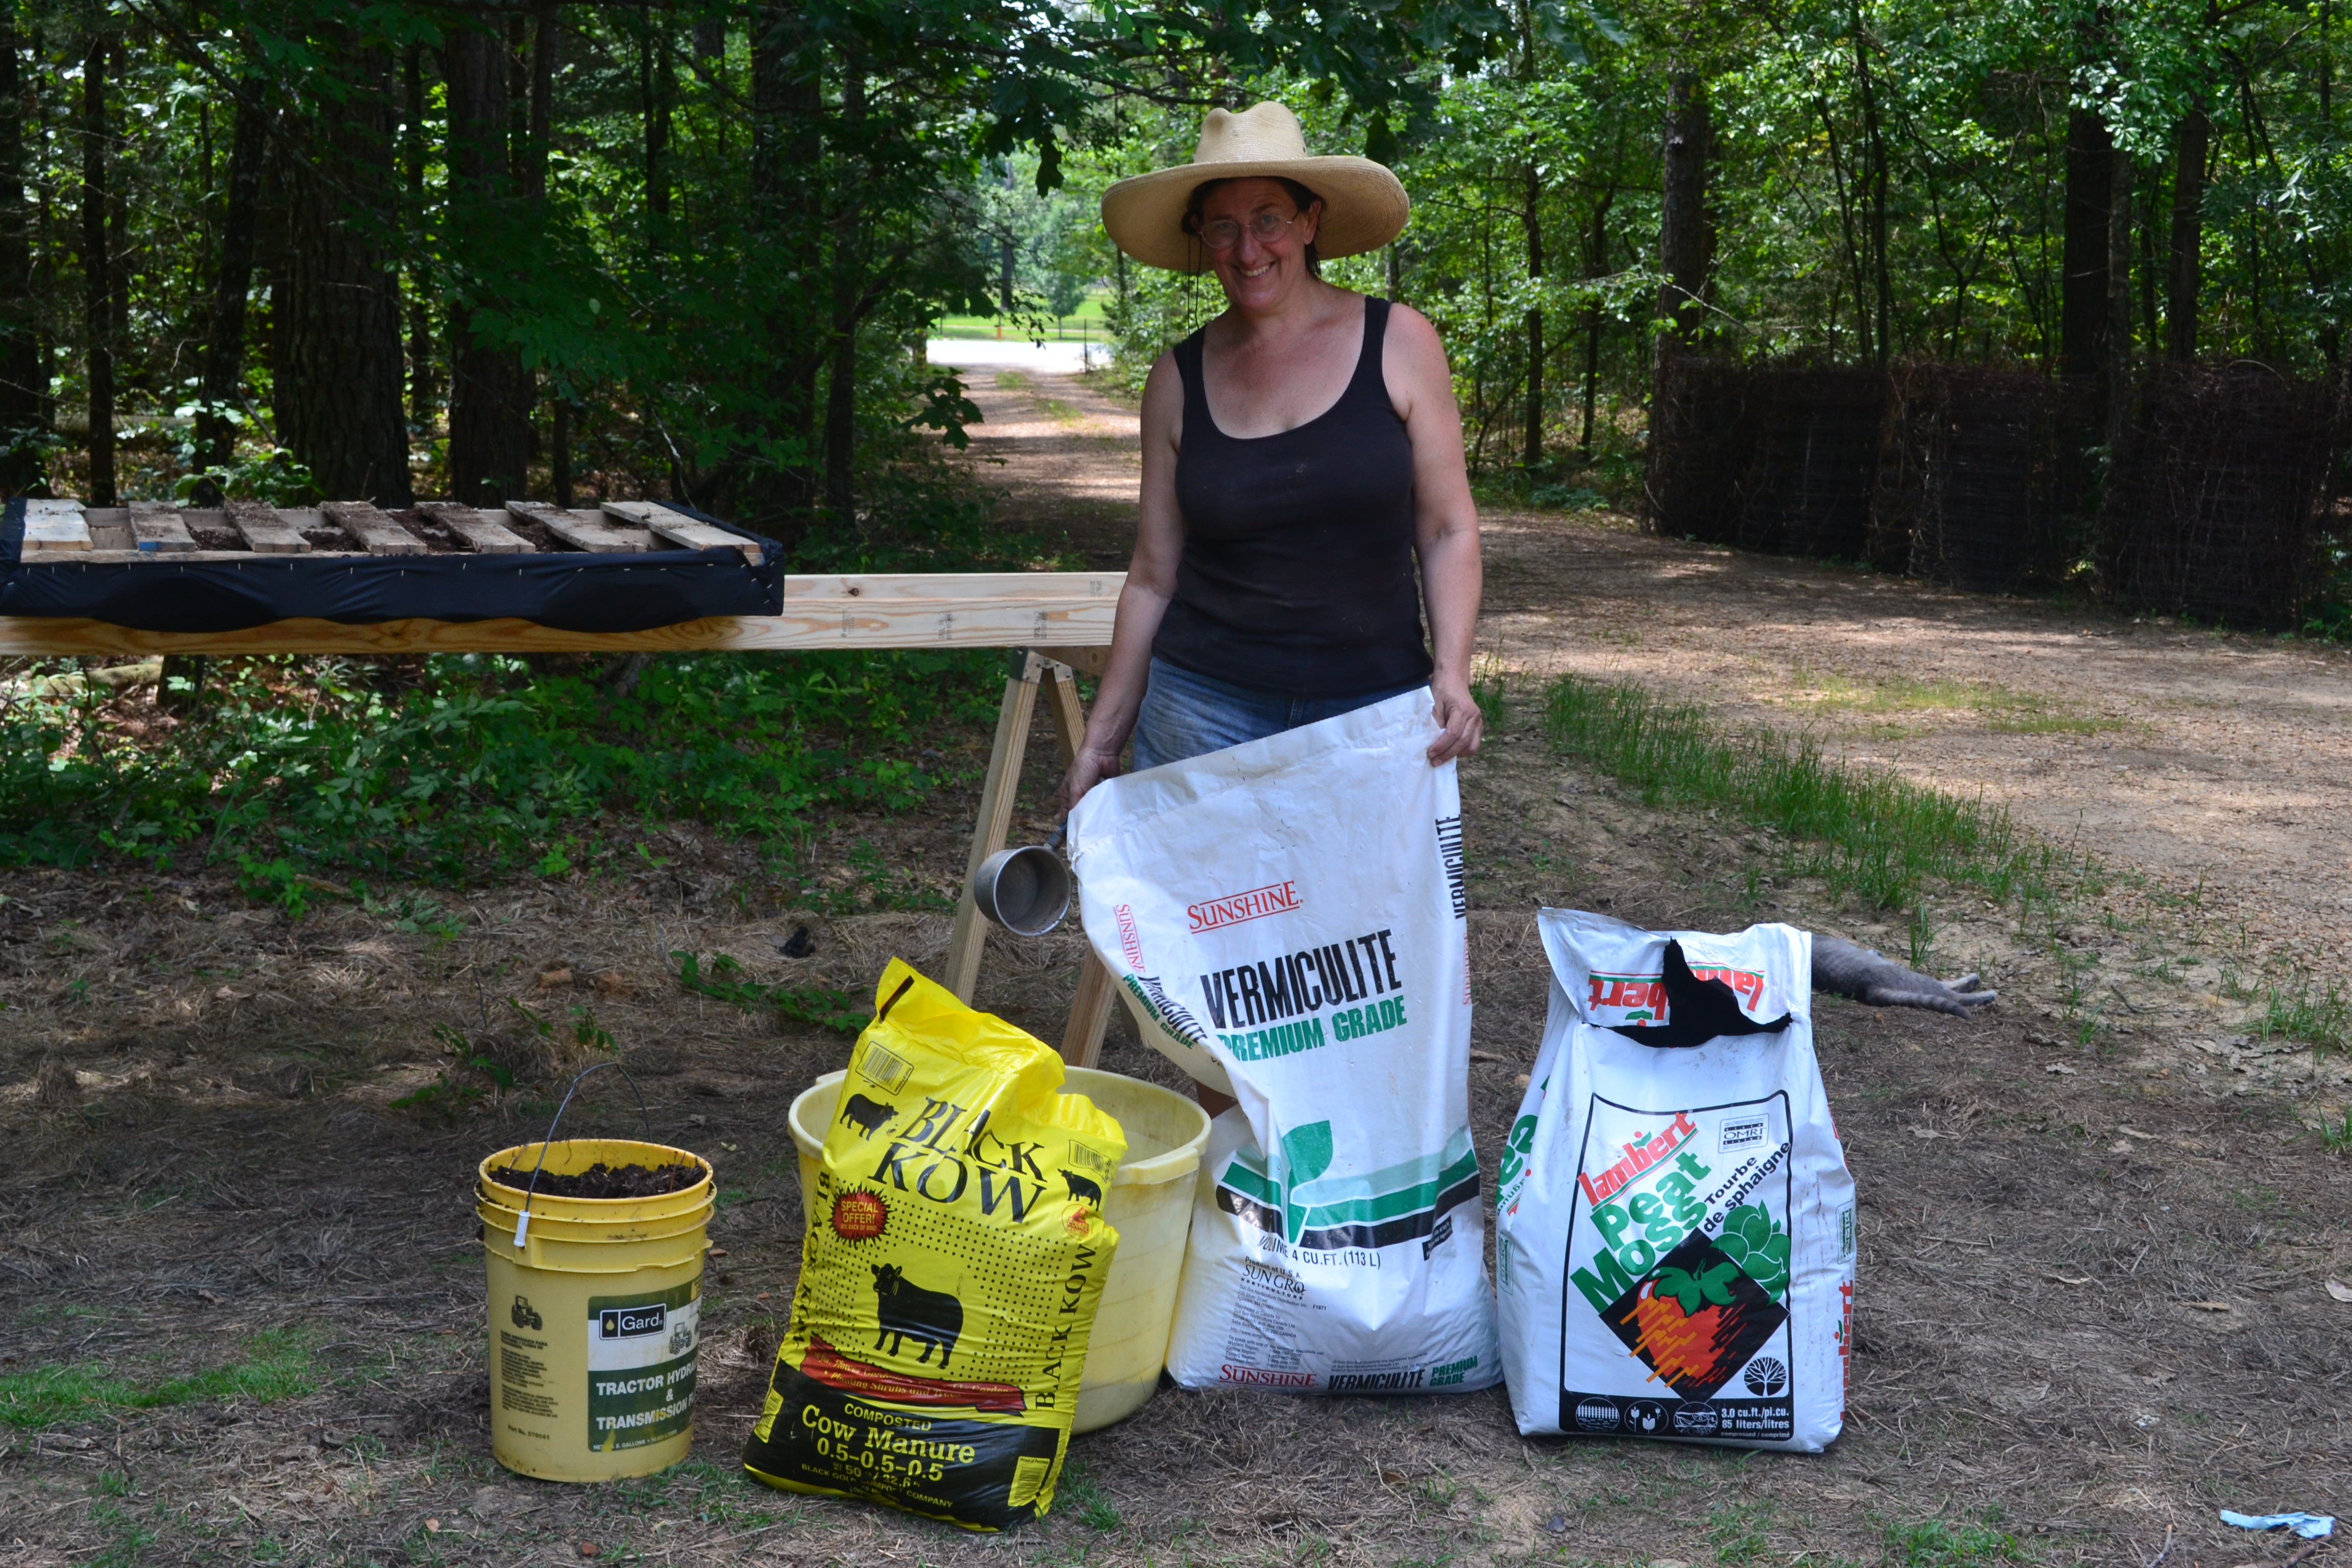
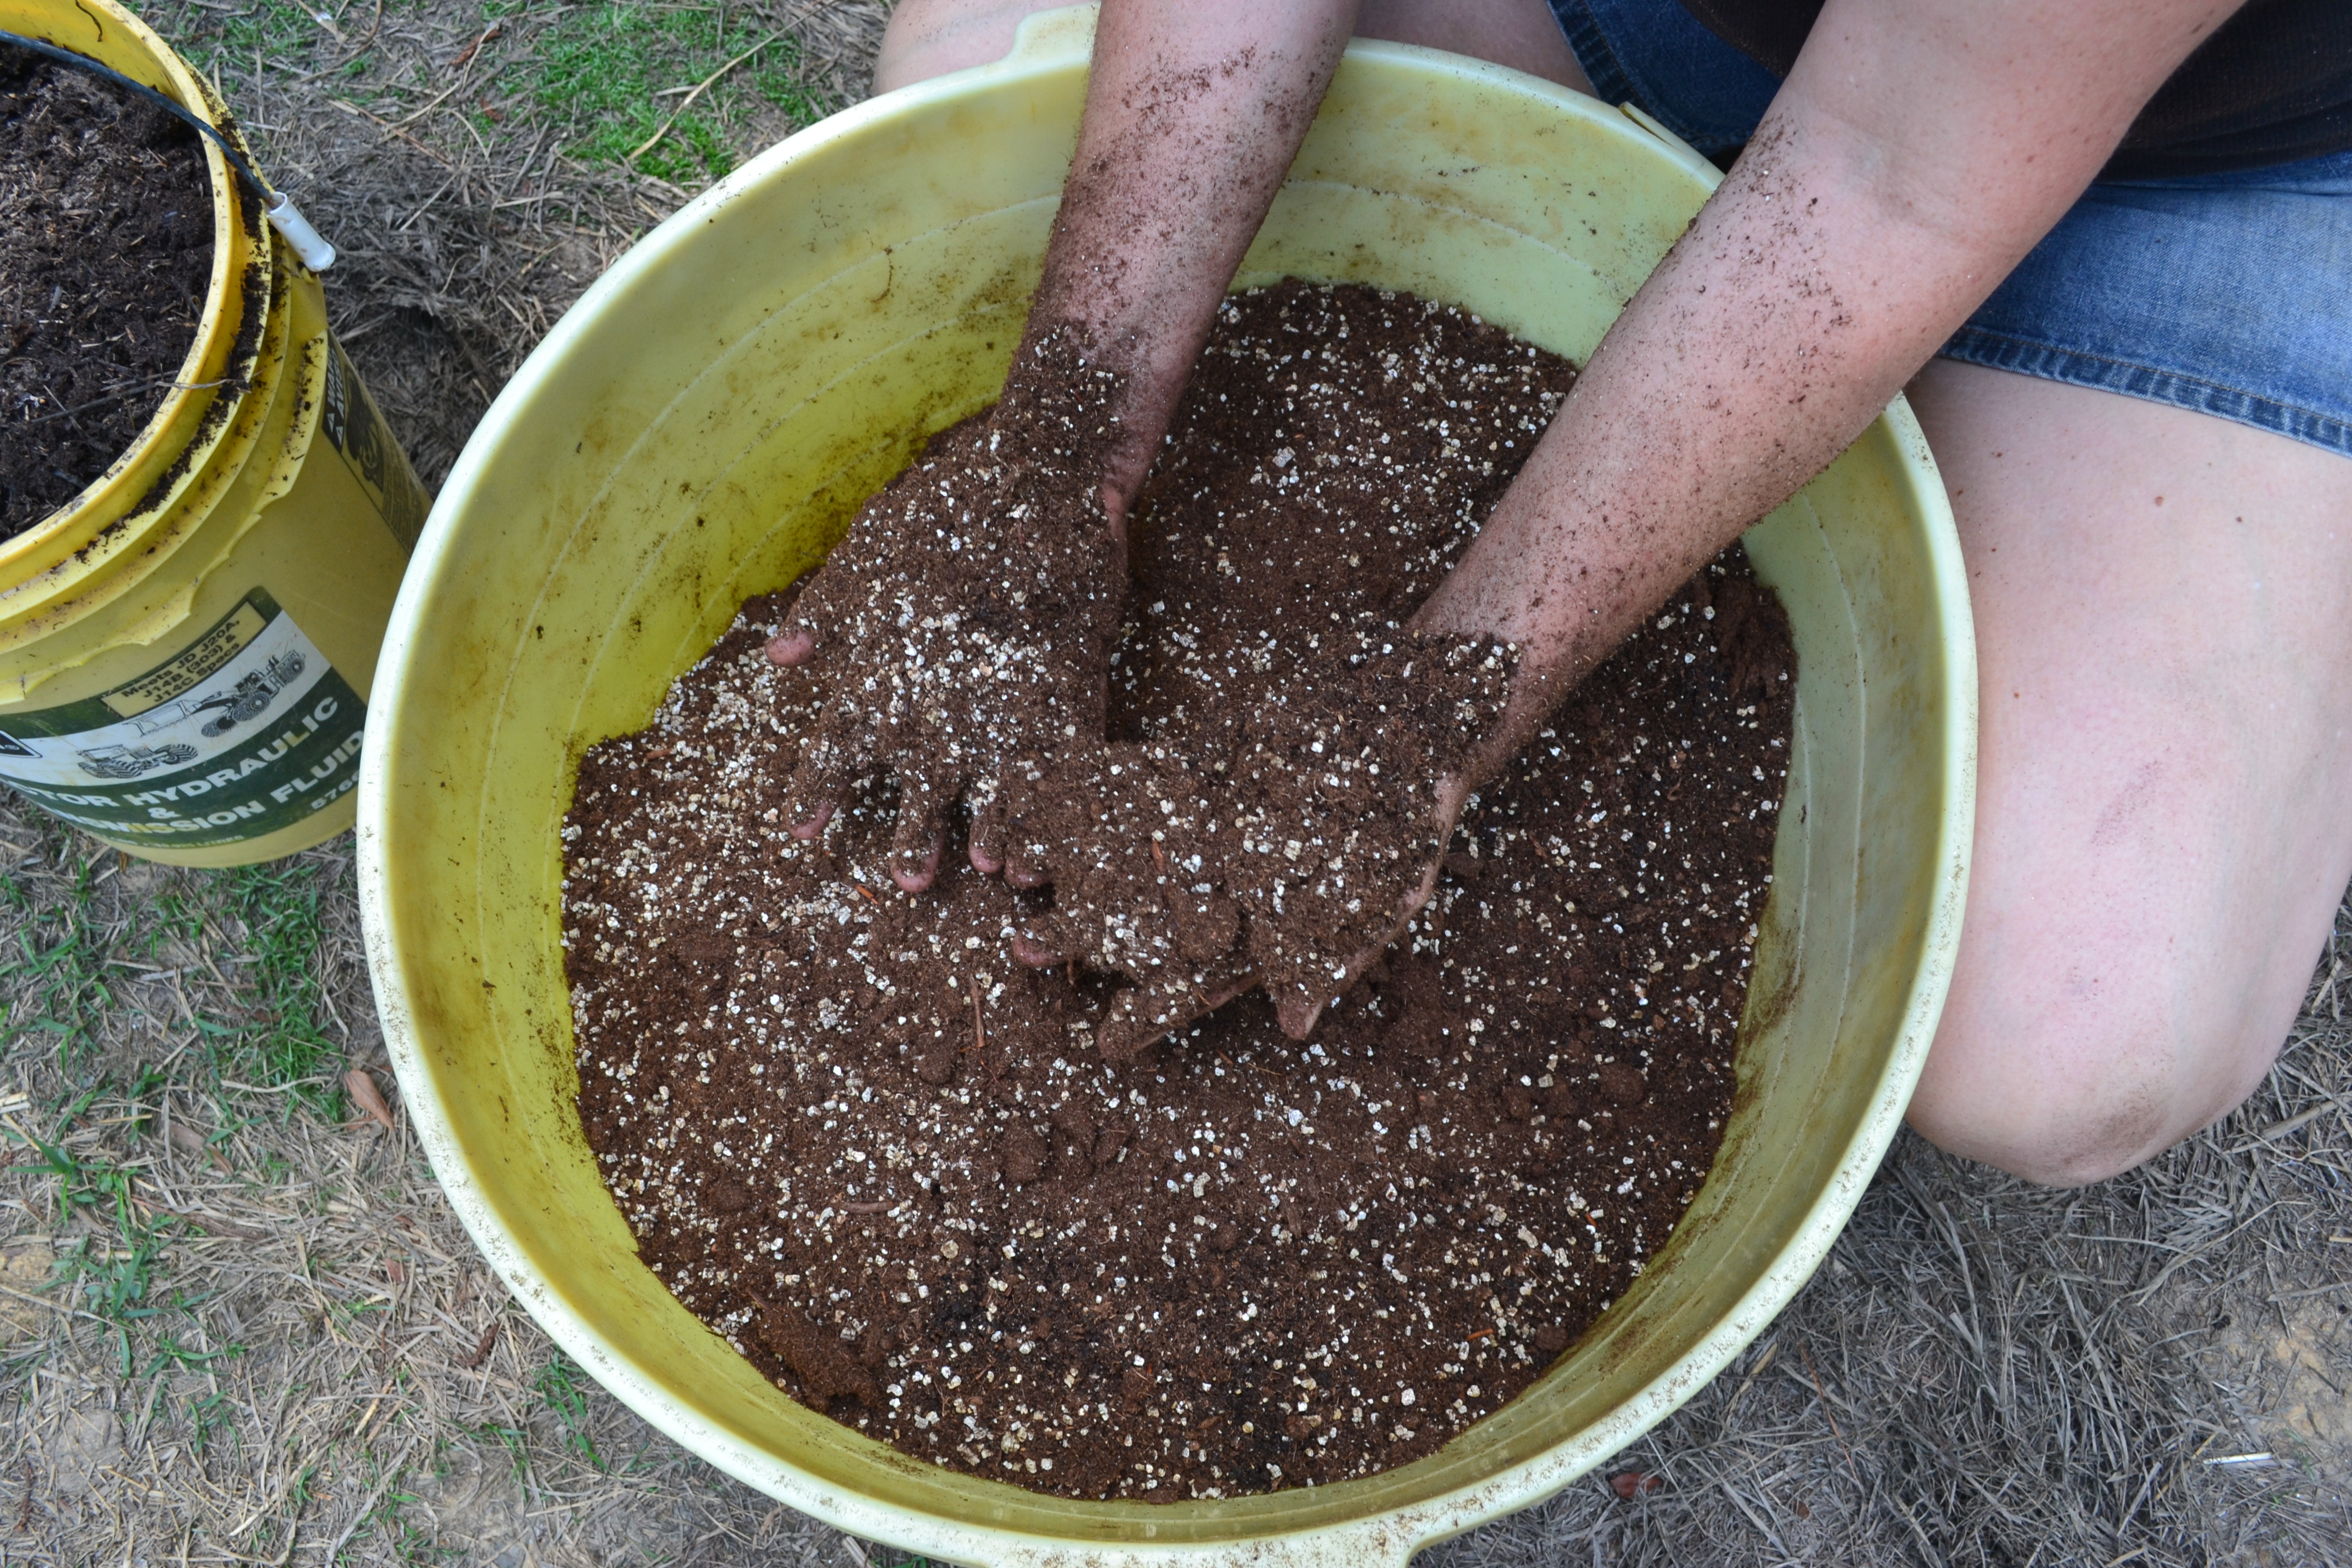
I find it easiest to mix by hand (by arm, really) in a big tub. The vermiculite and peat are fluffy and light weight and I start with them on the bottom, bringing them up through the composts as I mix and stir. There were some big healthy worms in the cow barn compost and I returned them to the main pile – it’s likely the pallet will get too hot and/or dry for them at some point and since they won’t be able to burrow down into the earth they’d probably die. No sense wasting good earthworms!
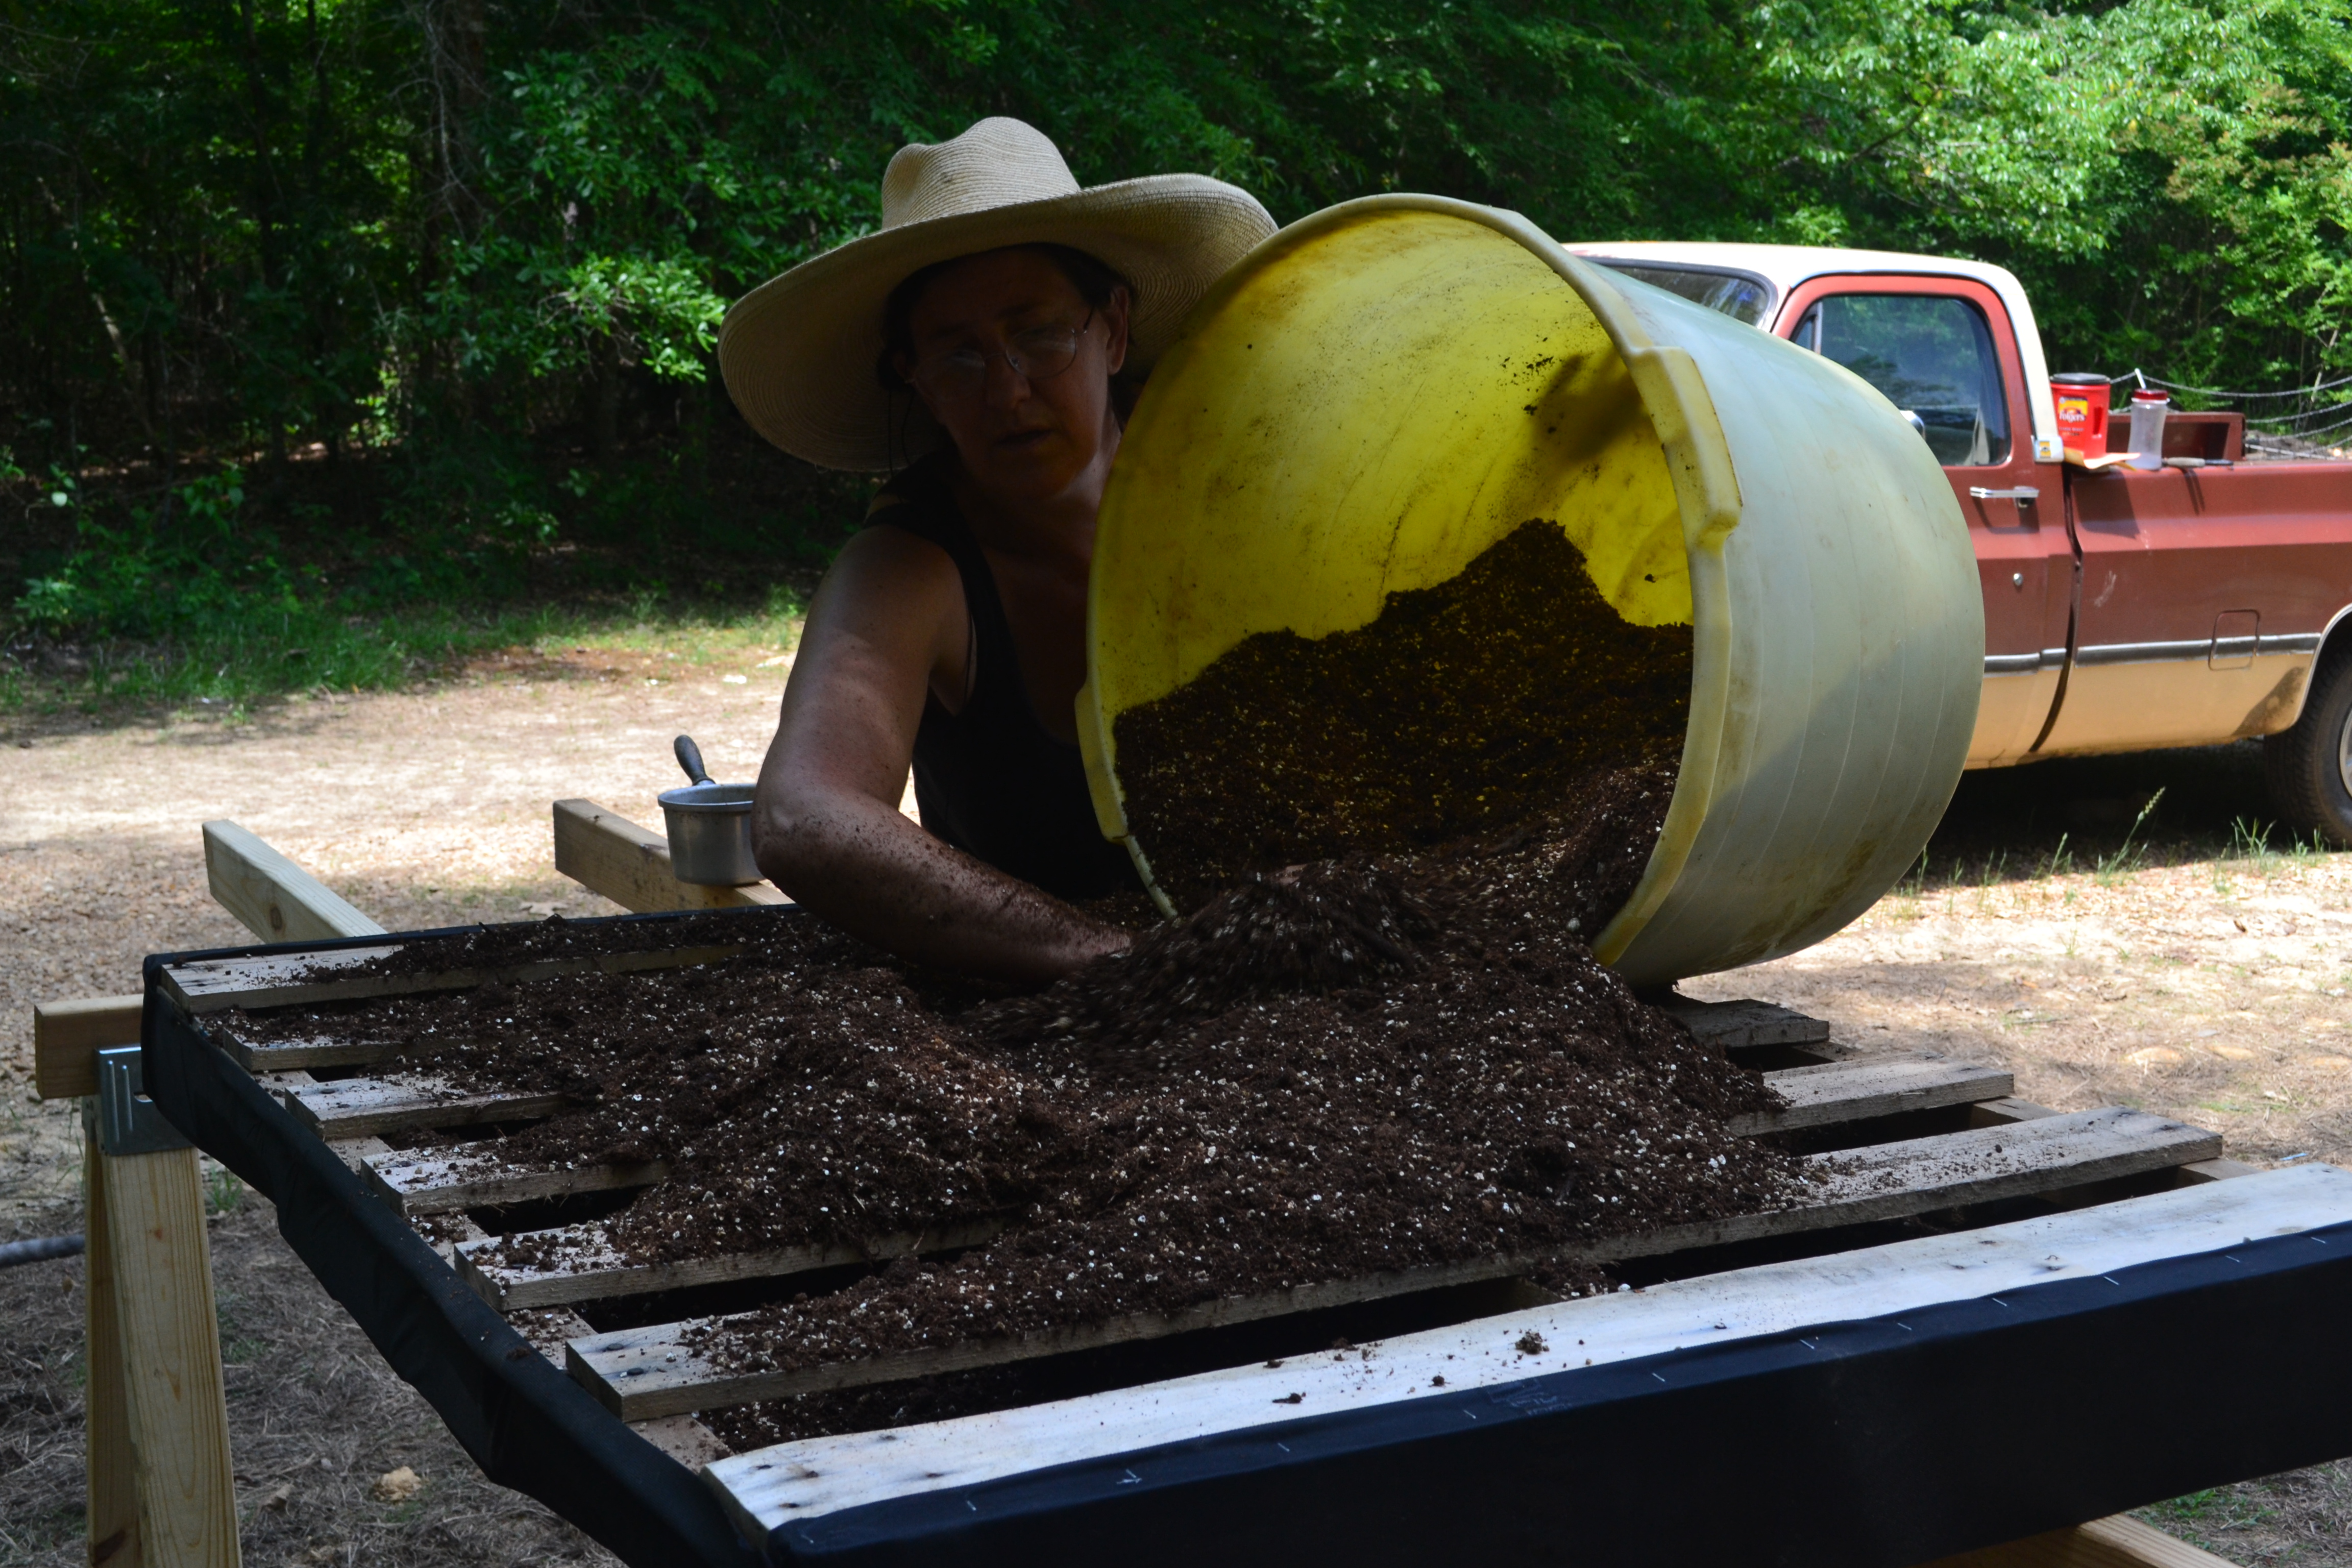
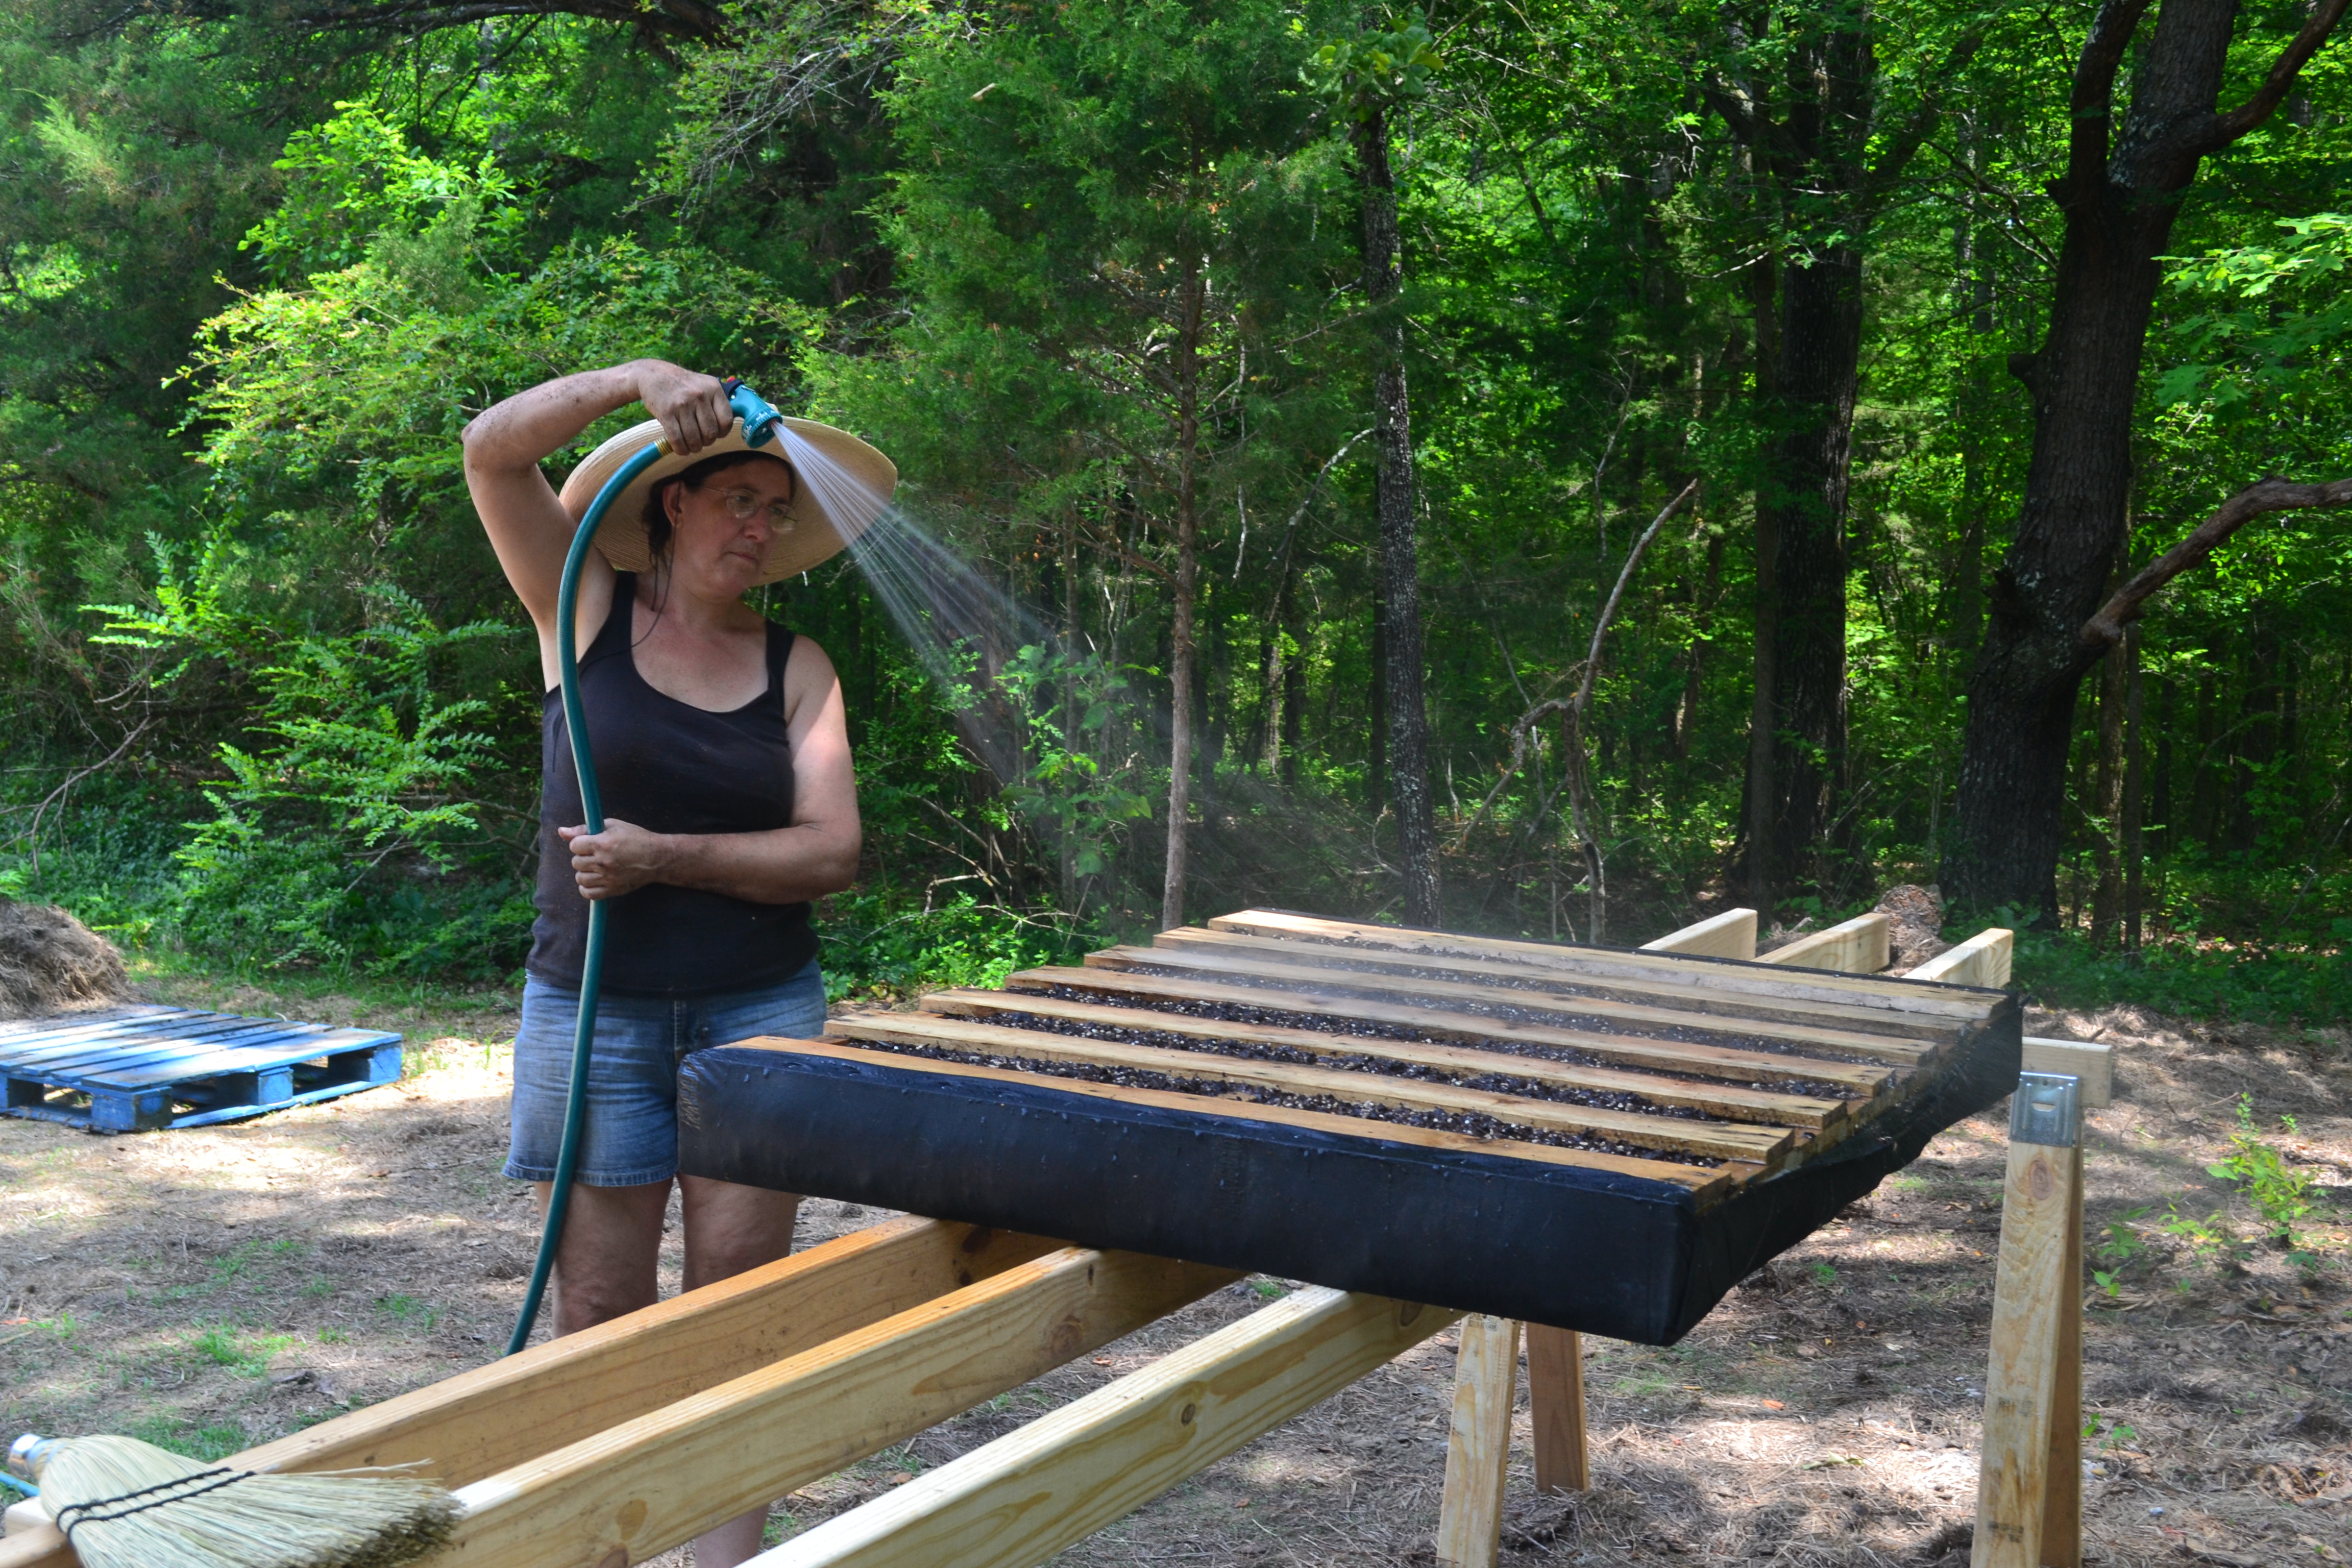
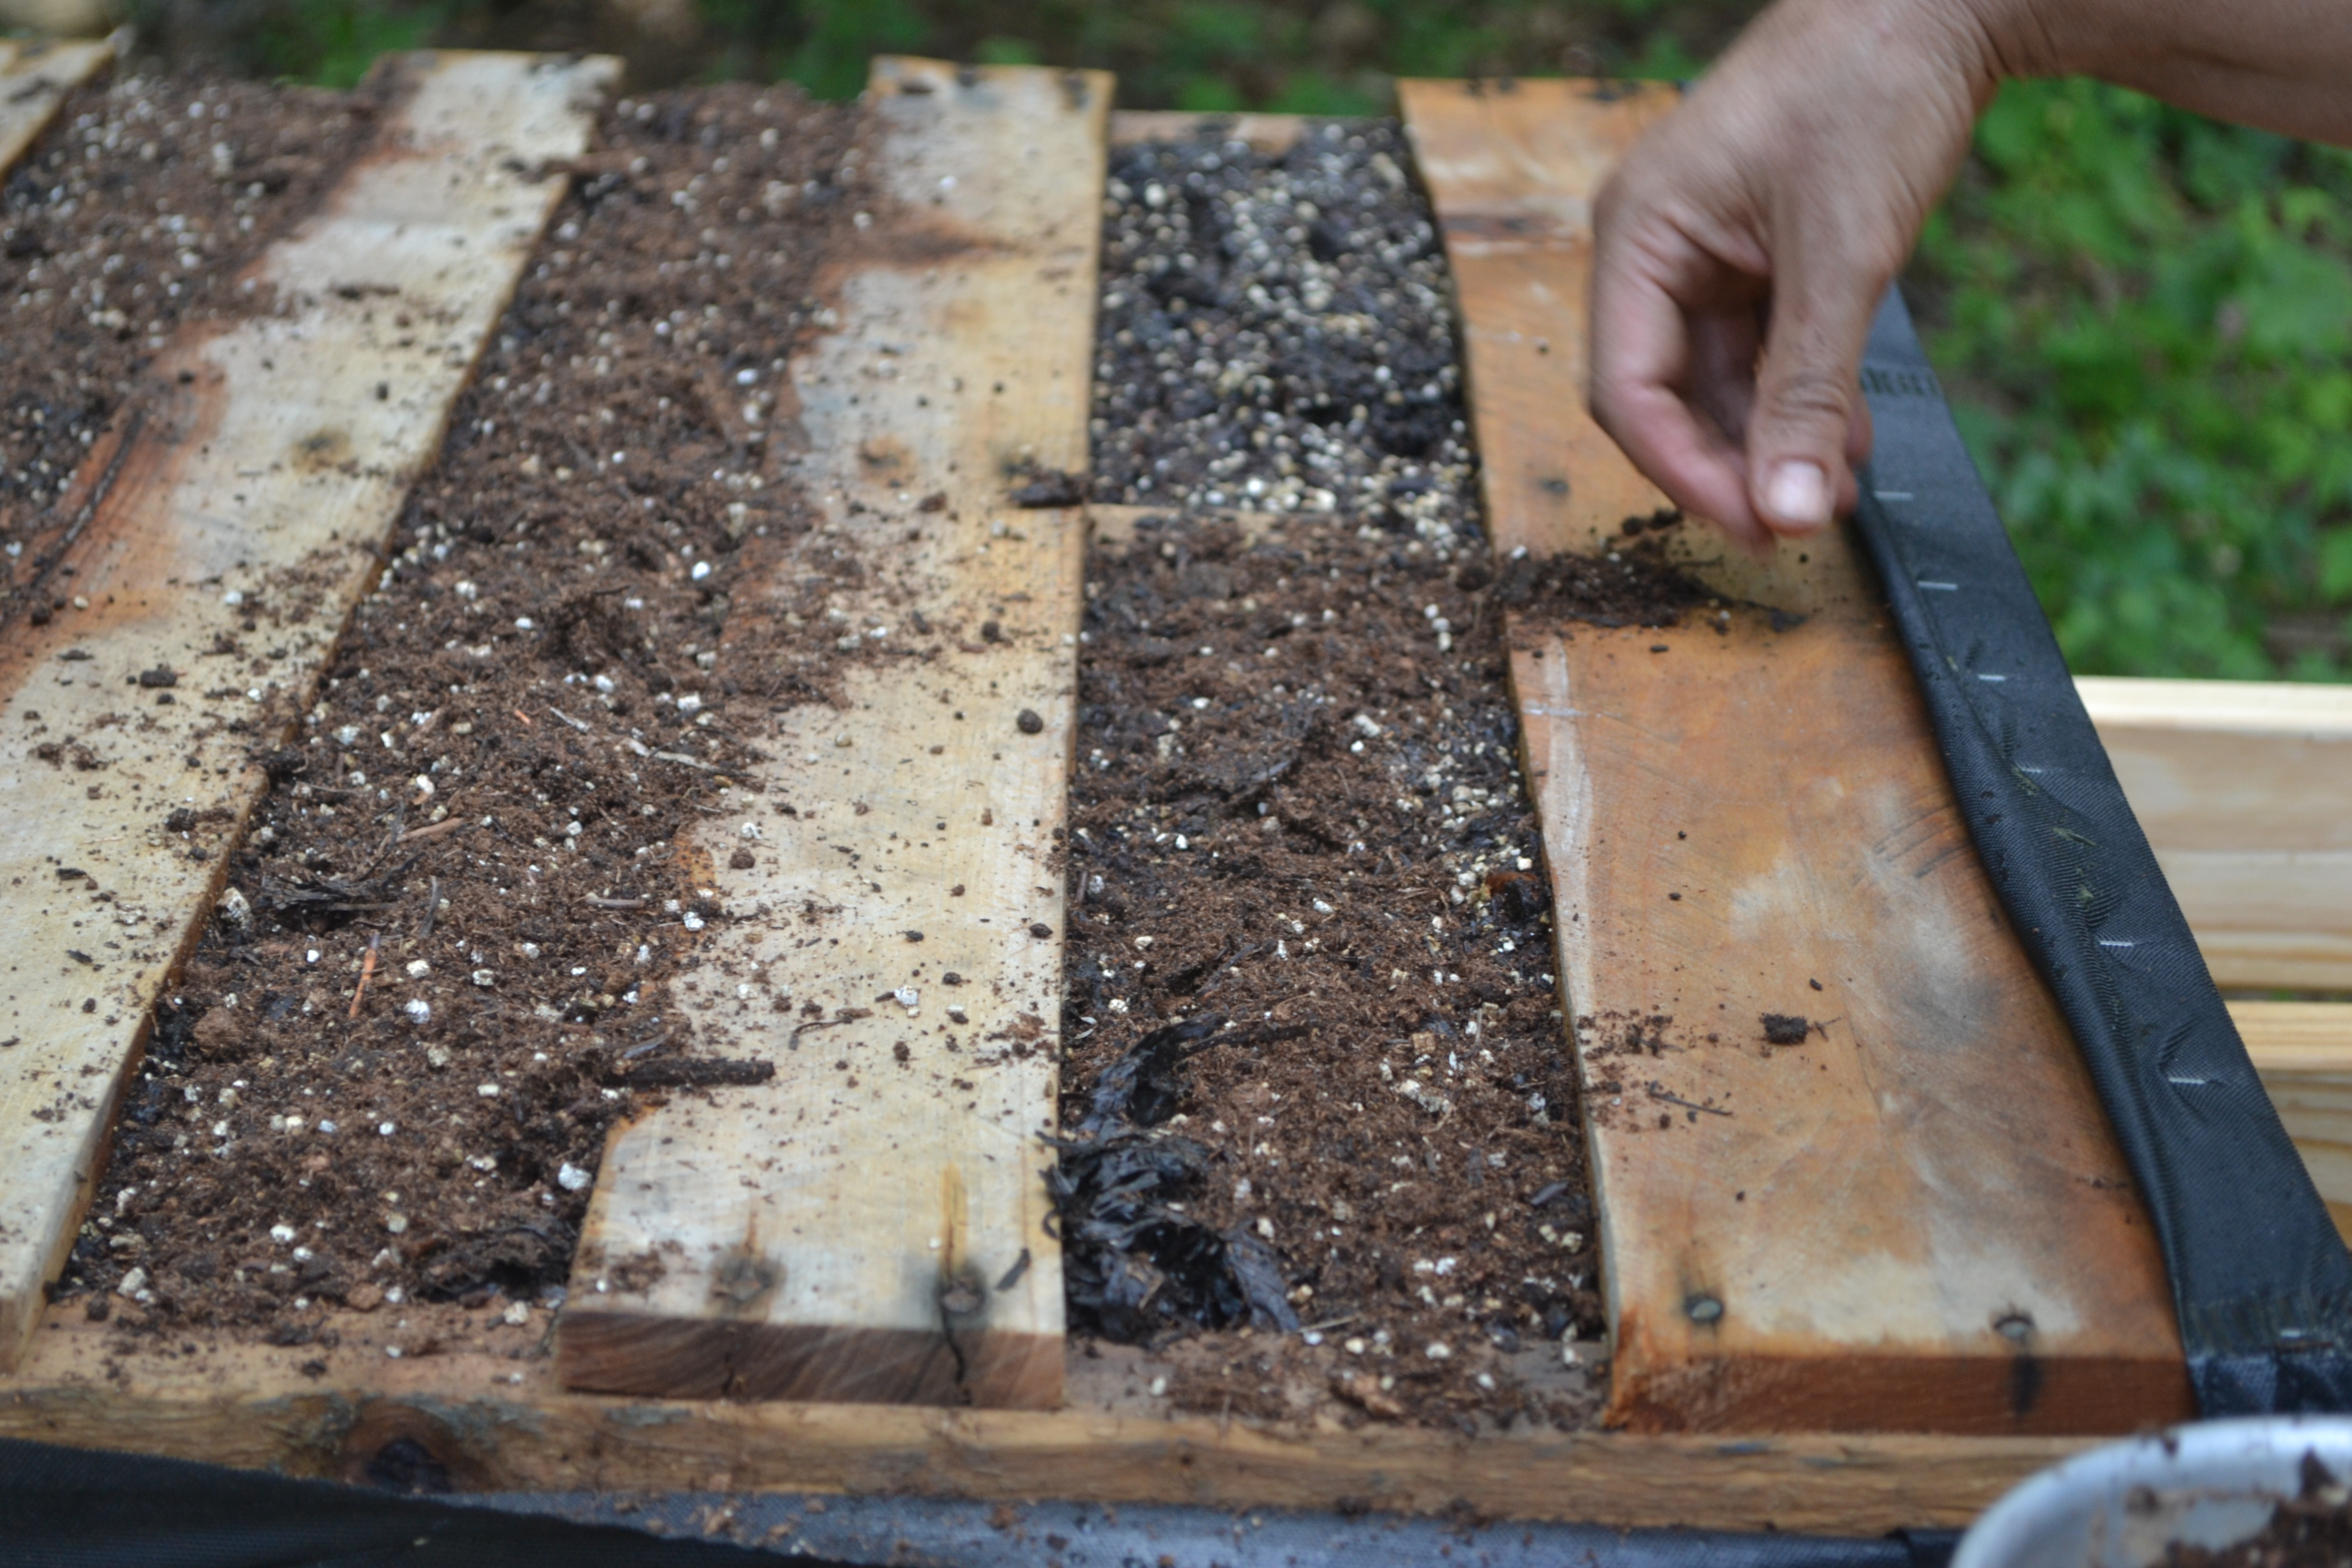
And now it’s time to pour the mix into the pallet, pushing it out to the sides and under the slats, Filling the pallet, maybe even over-stuffing it a bit. It’ll settle with time and water and you don’t want to be trying to add more dirt once your plants are growing. Water the whole thing thoroughly – until water is dripping out the bottom through the fabric. Add more soil mix if necessary. This is also a good time to clean off the slats so that all the dirt is In the pallet. Lettuce seeds are really small and clean slats will make it easier to ensure the seeds are where they need to be in order to grow.
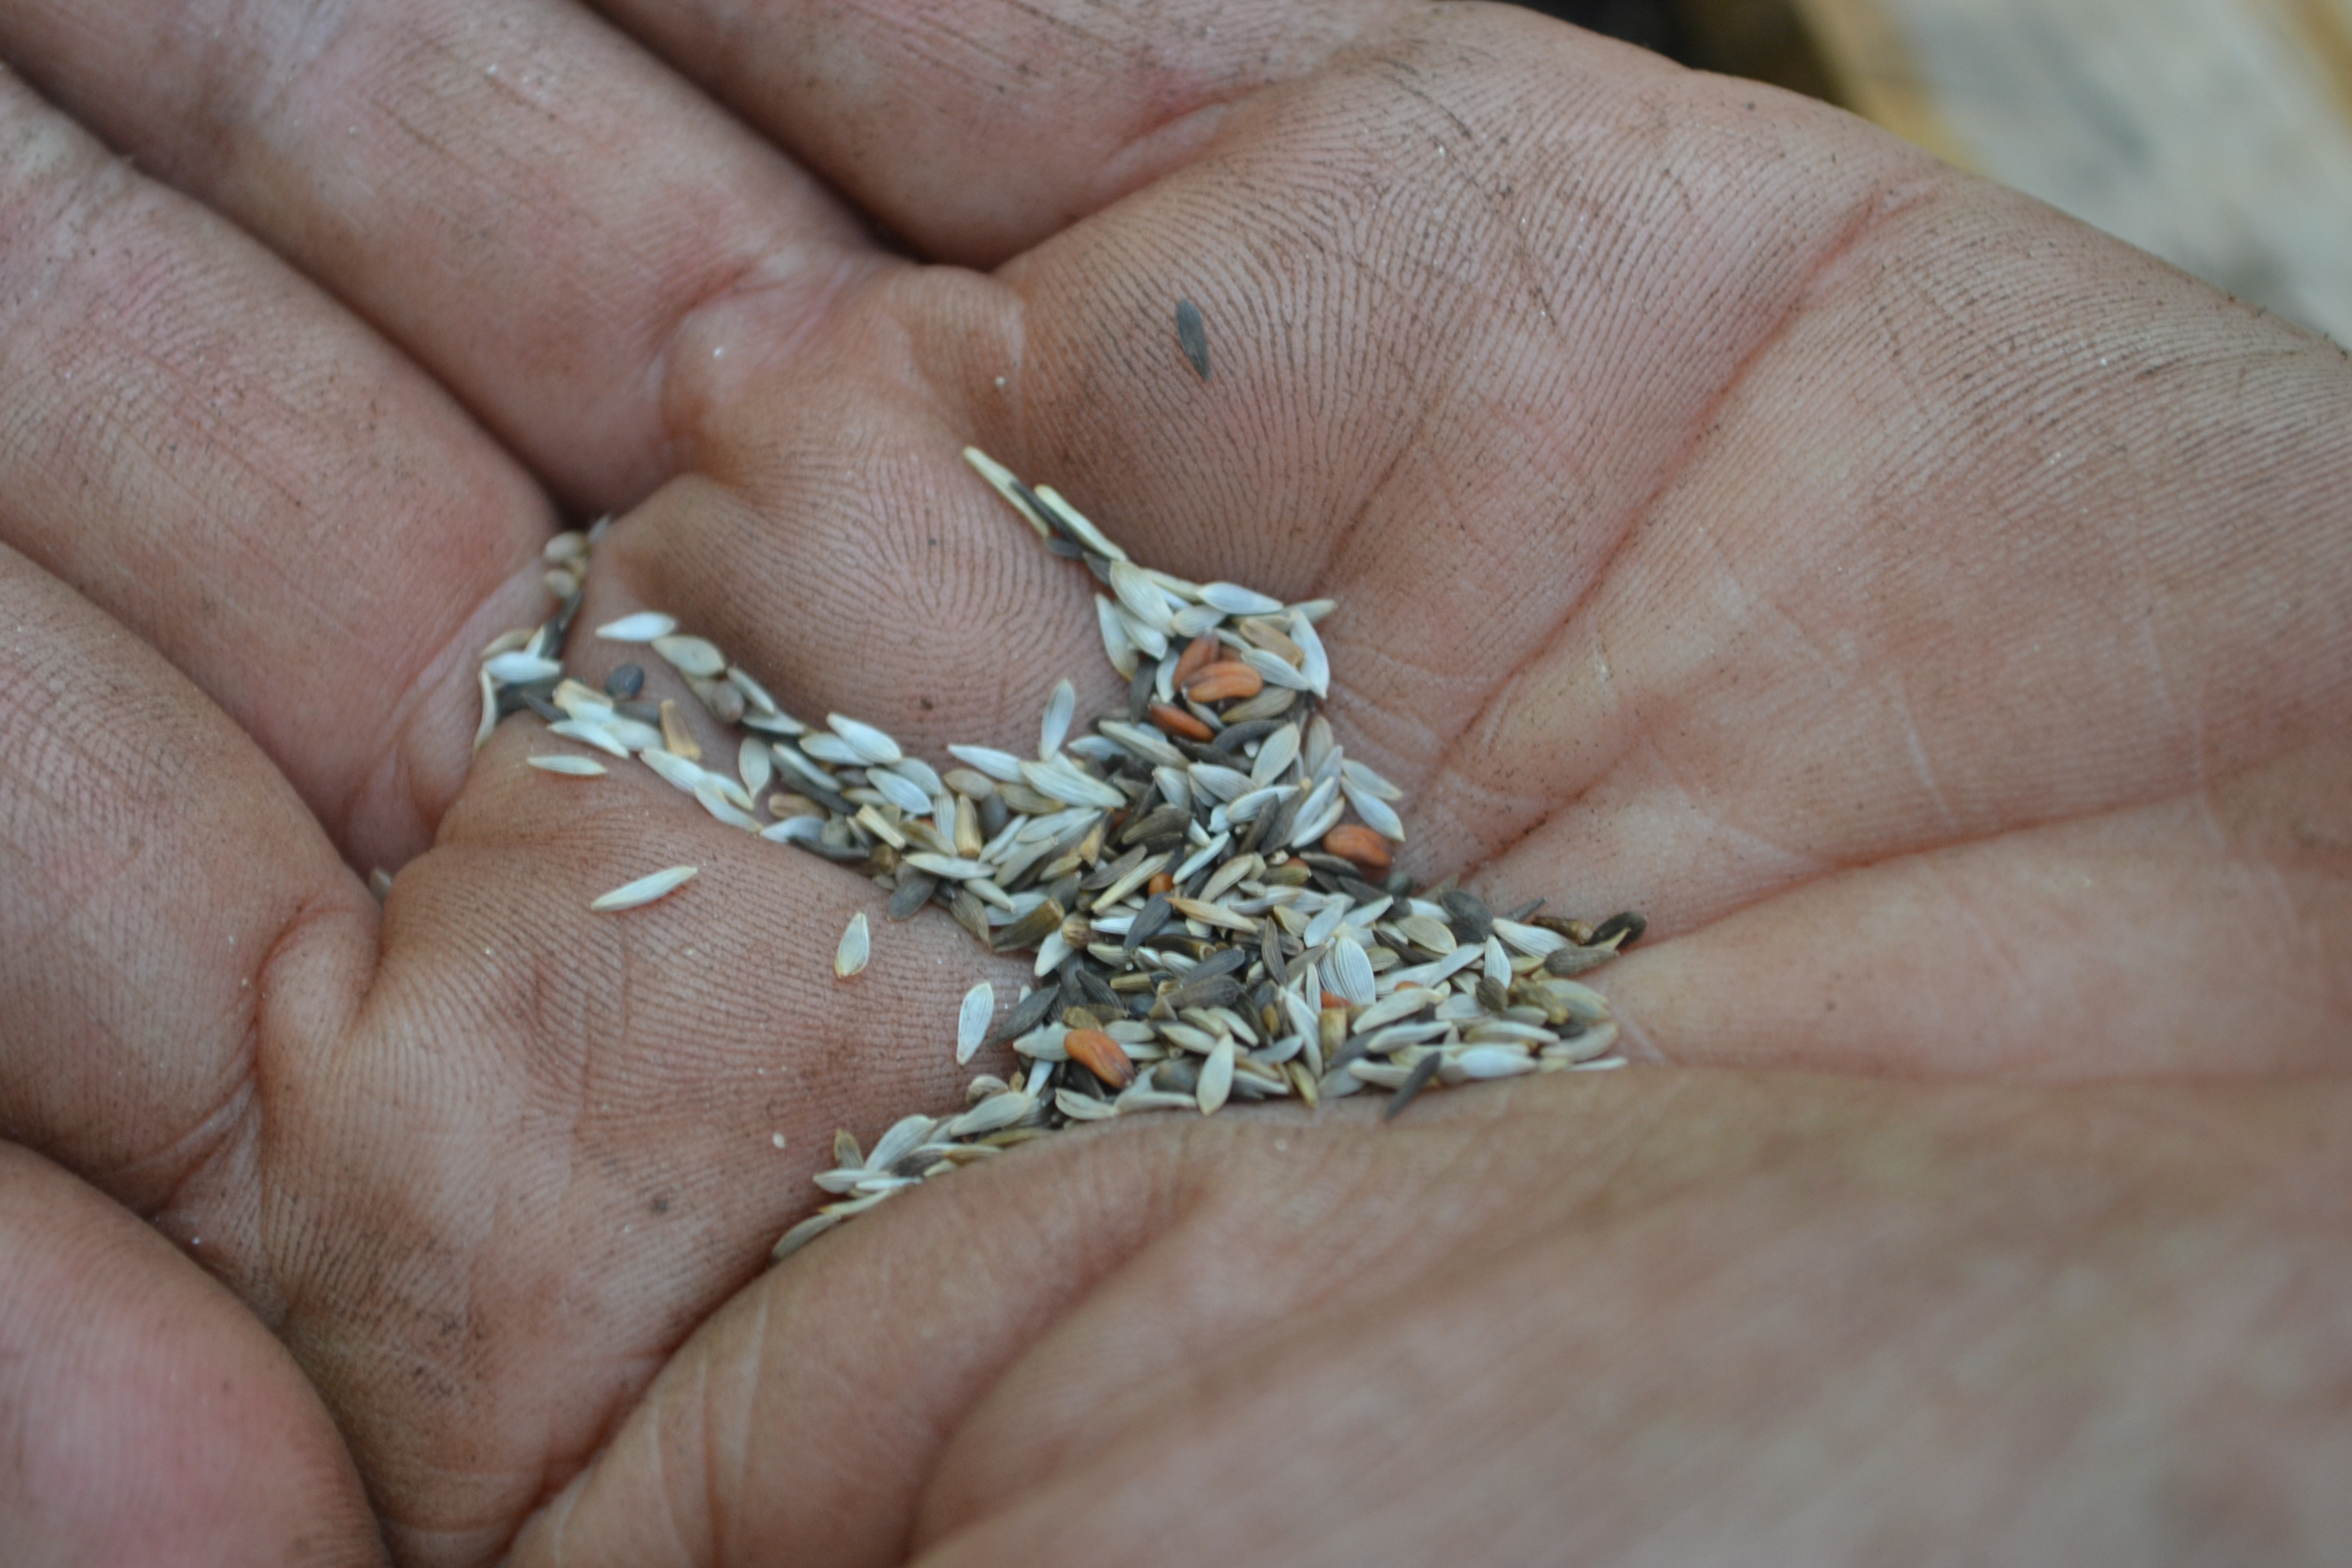
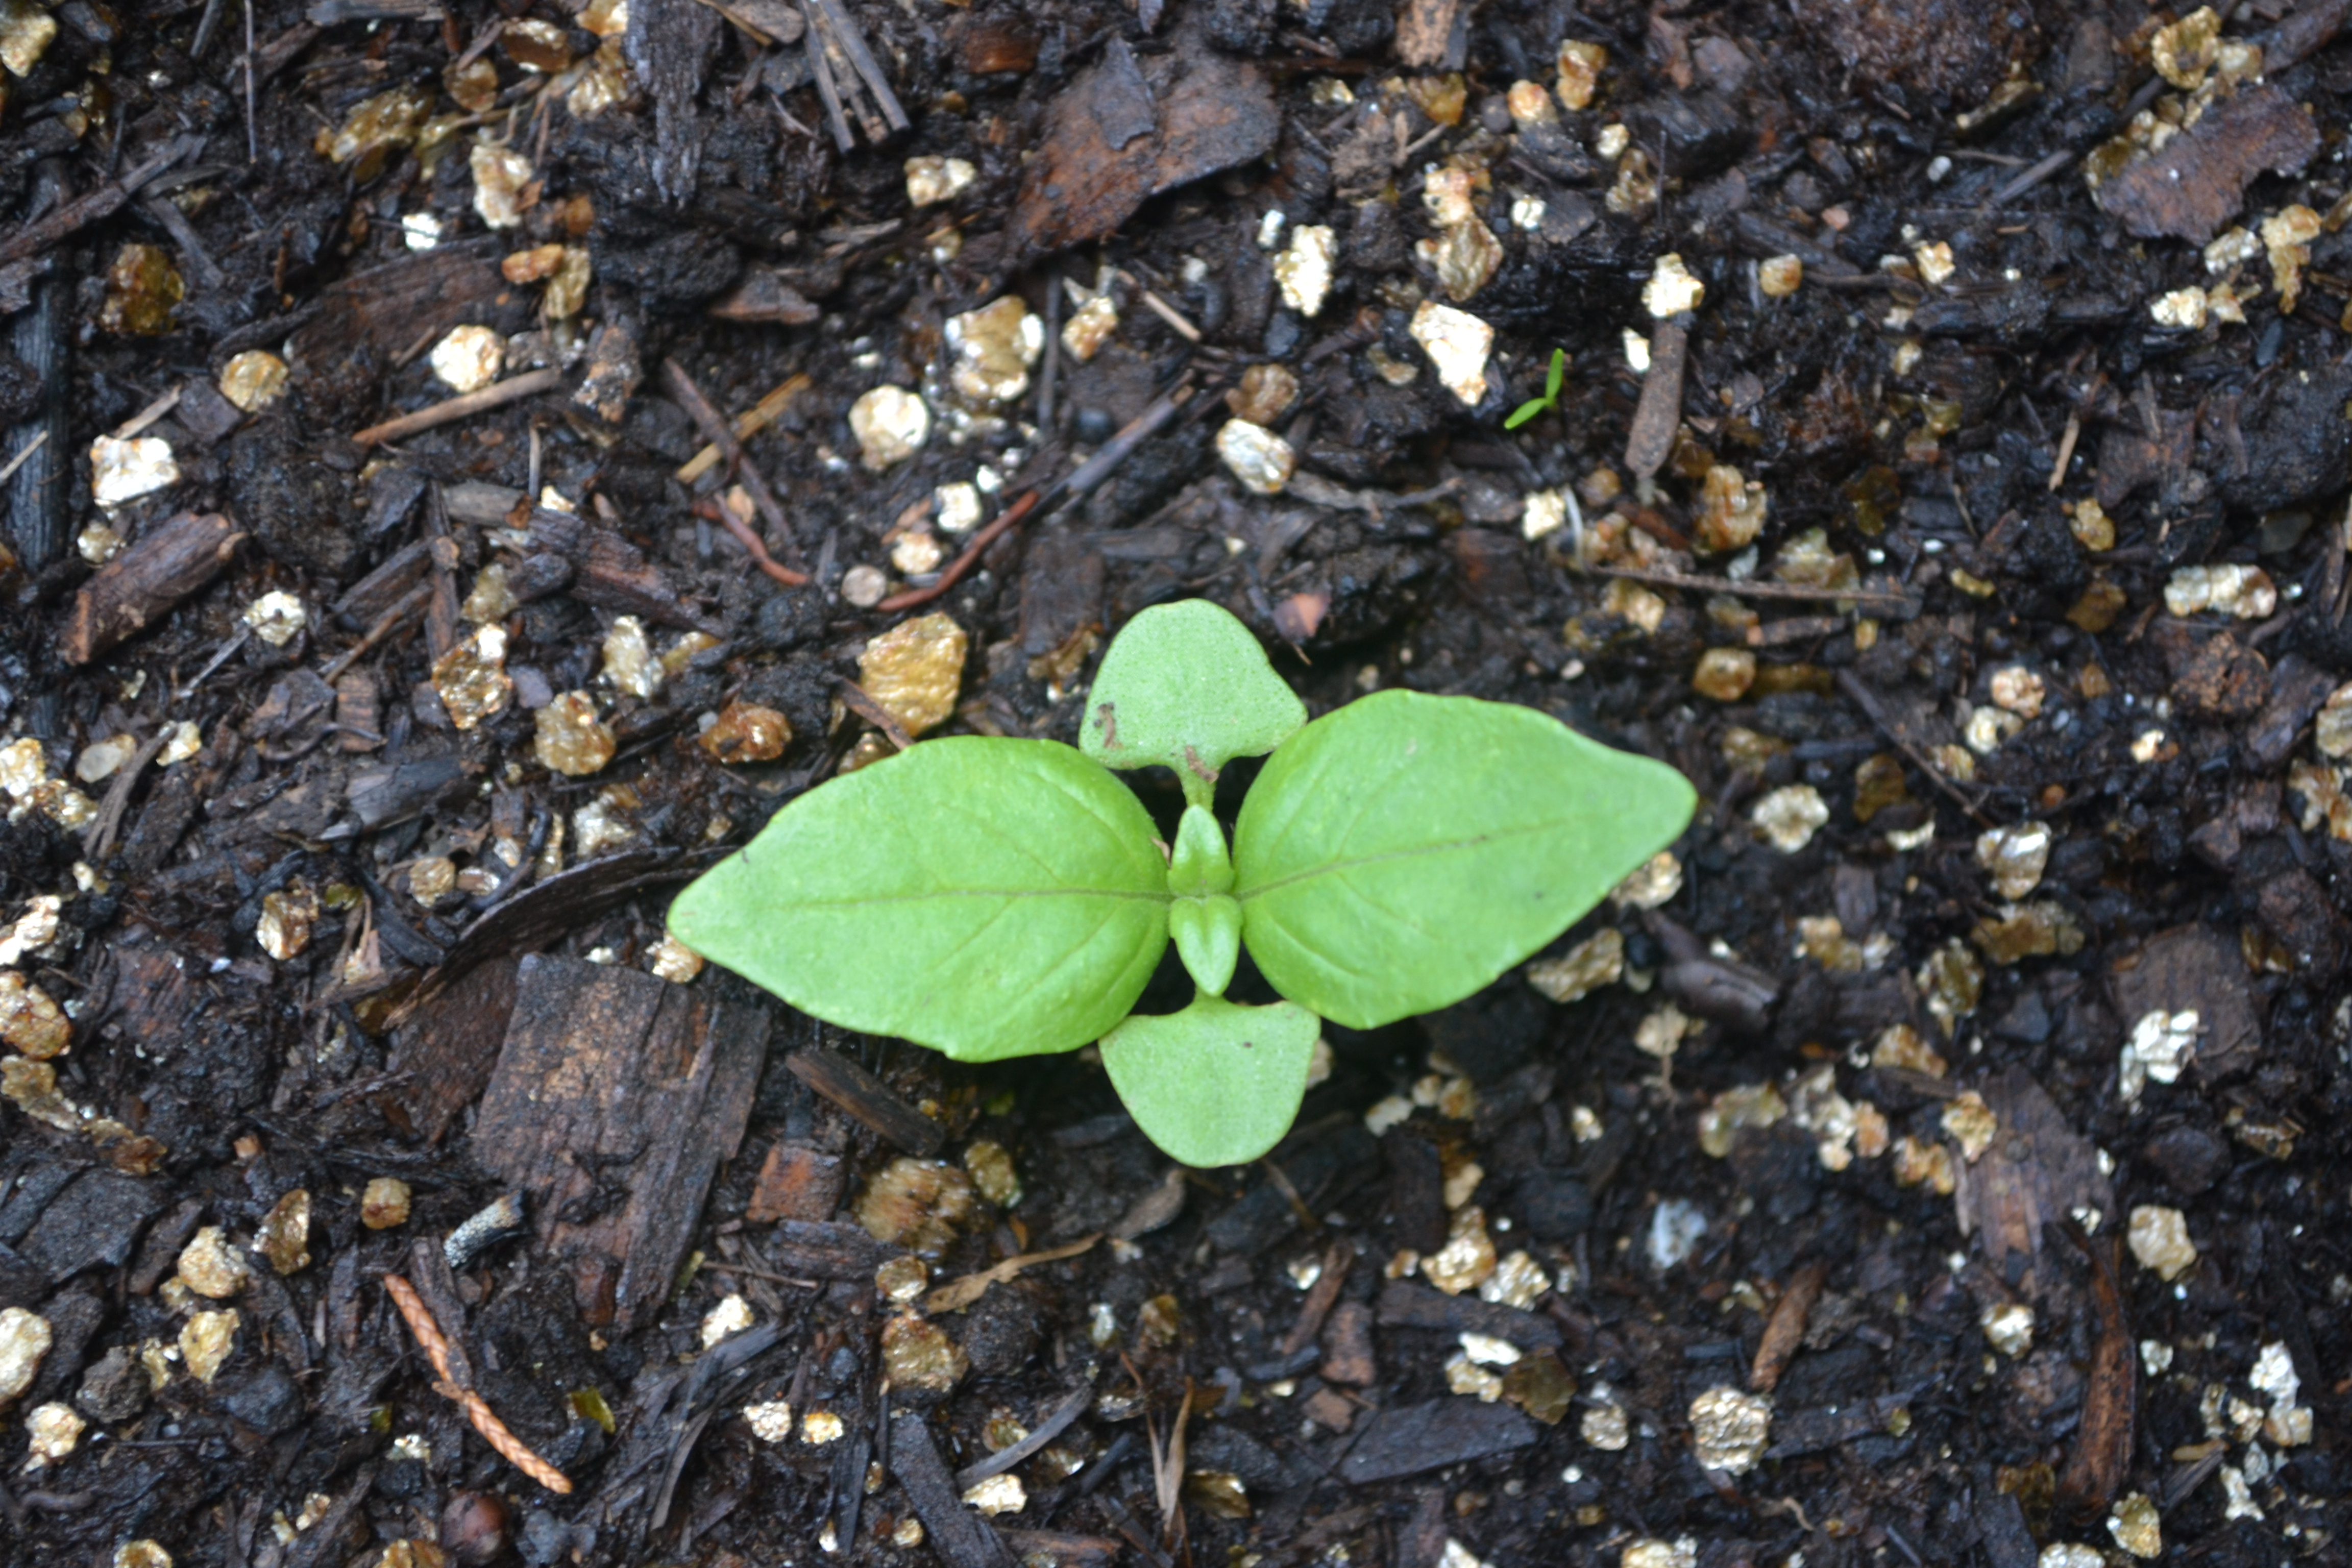
I planted each row with a different seed (or seed mix) – more fun experimentation. The salad green mixes I harvest as “baby greens” so I sort of sprinkle them down the row, trying to imagine each seed as several leaves, aiming for an even distribution (my goal is to not see any dirt once the leaves grow in but to leave enough room for each plant to eat, drink and breathe without getting smothered by its neighbors). The rainbow radishes I planted as if each seed would sprout and need a one inch diameter space in order to mature. The head lettuce and bok choi I’m trying out back I planted with enough space between each seed to allow a head to grow. Some of the other gardens I’m doing the more traditional “sow many more seeds than you want to have grow and then thin them once they sprout” method but it feels wasteful and the thinning is time consuming and I’m having such good germination rates that it’s making less and less sense than just planting as if each seed will turn into a plant, just like it’s supposed to!
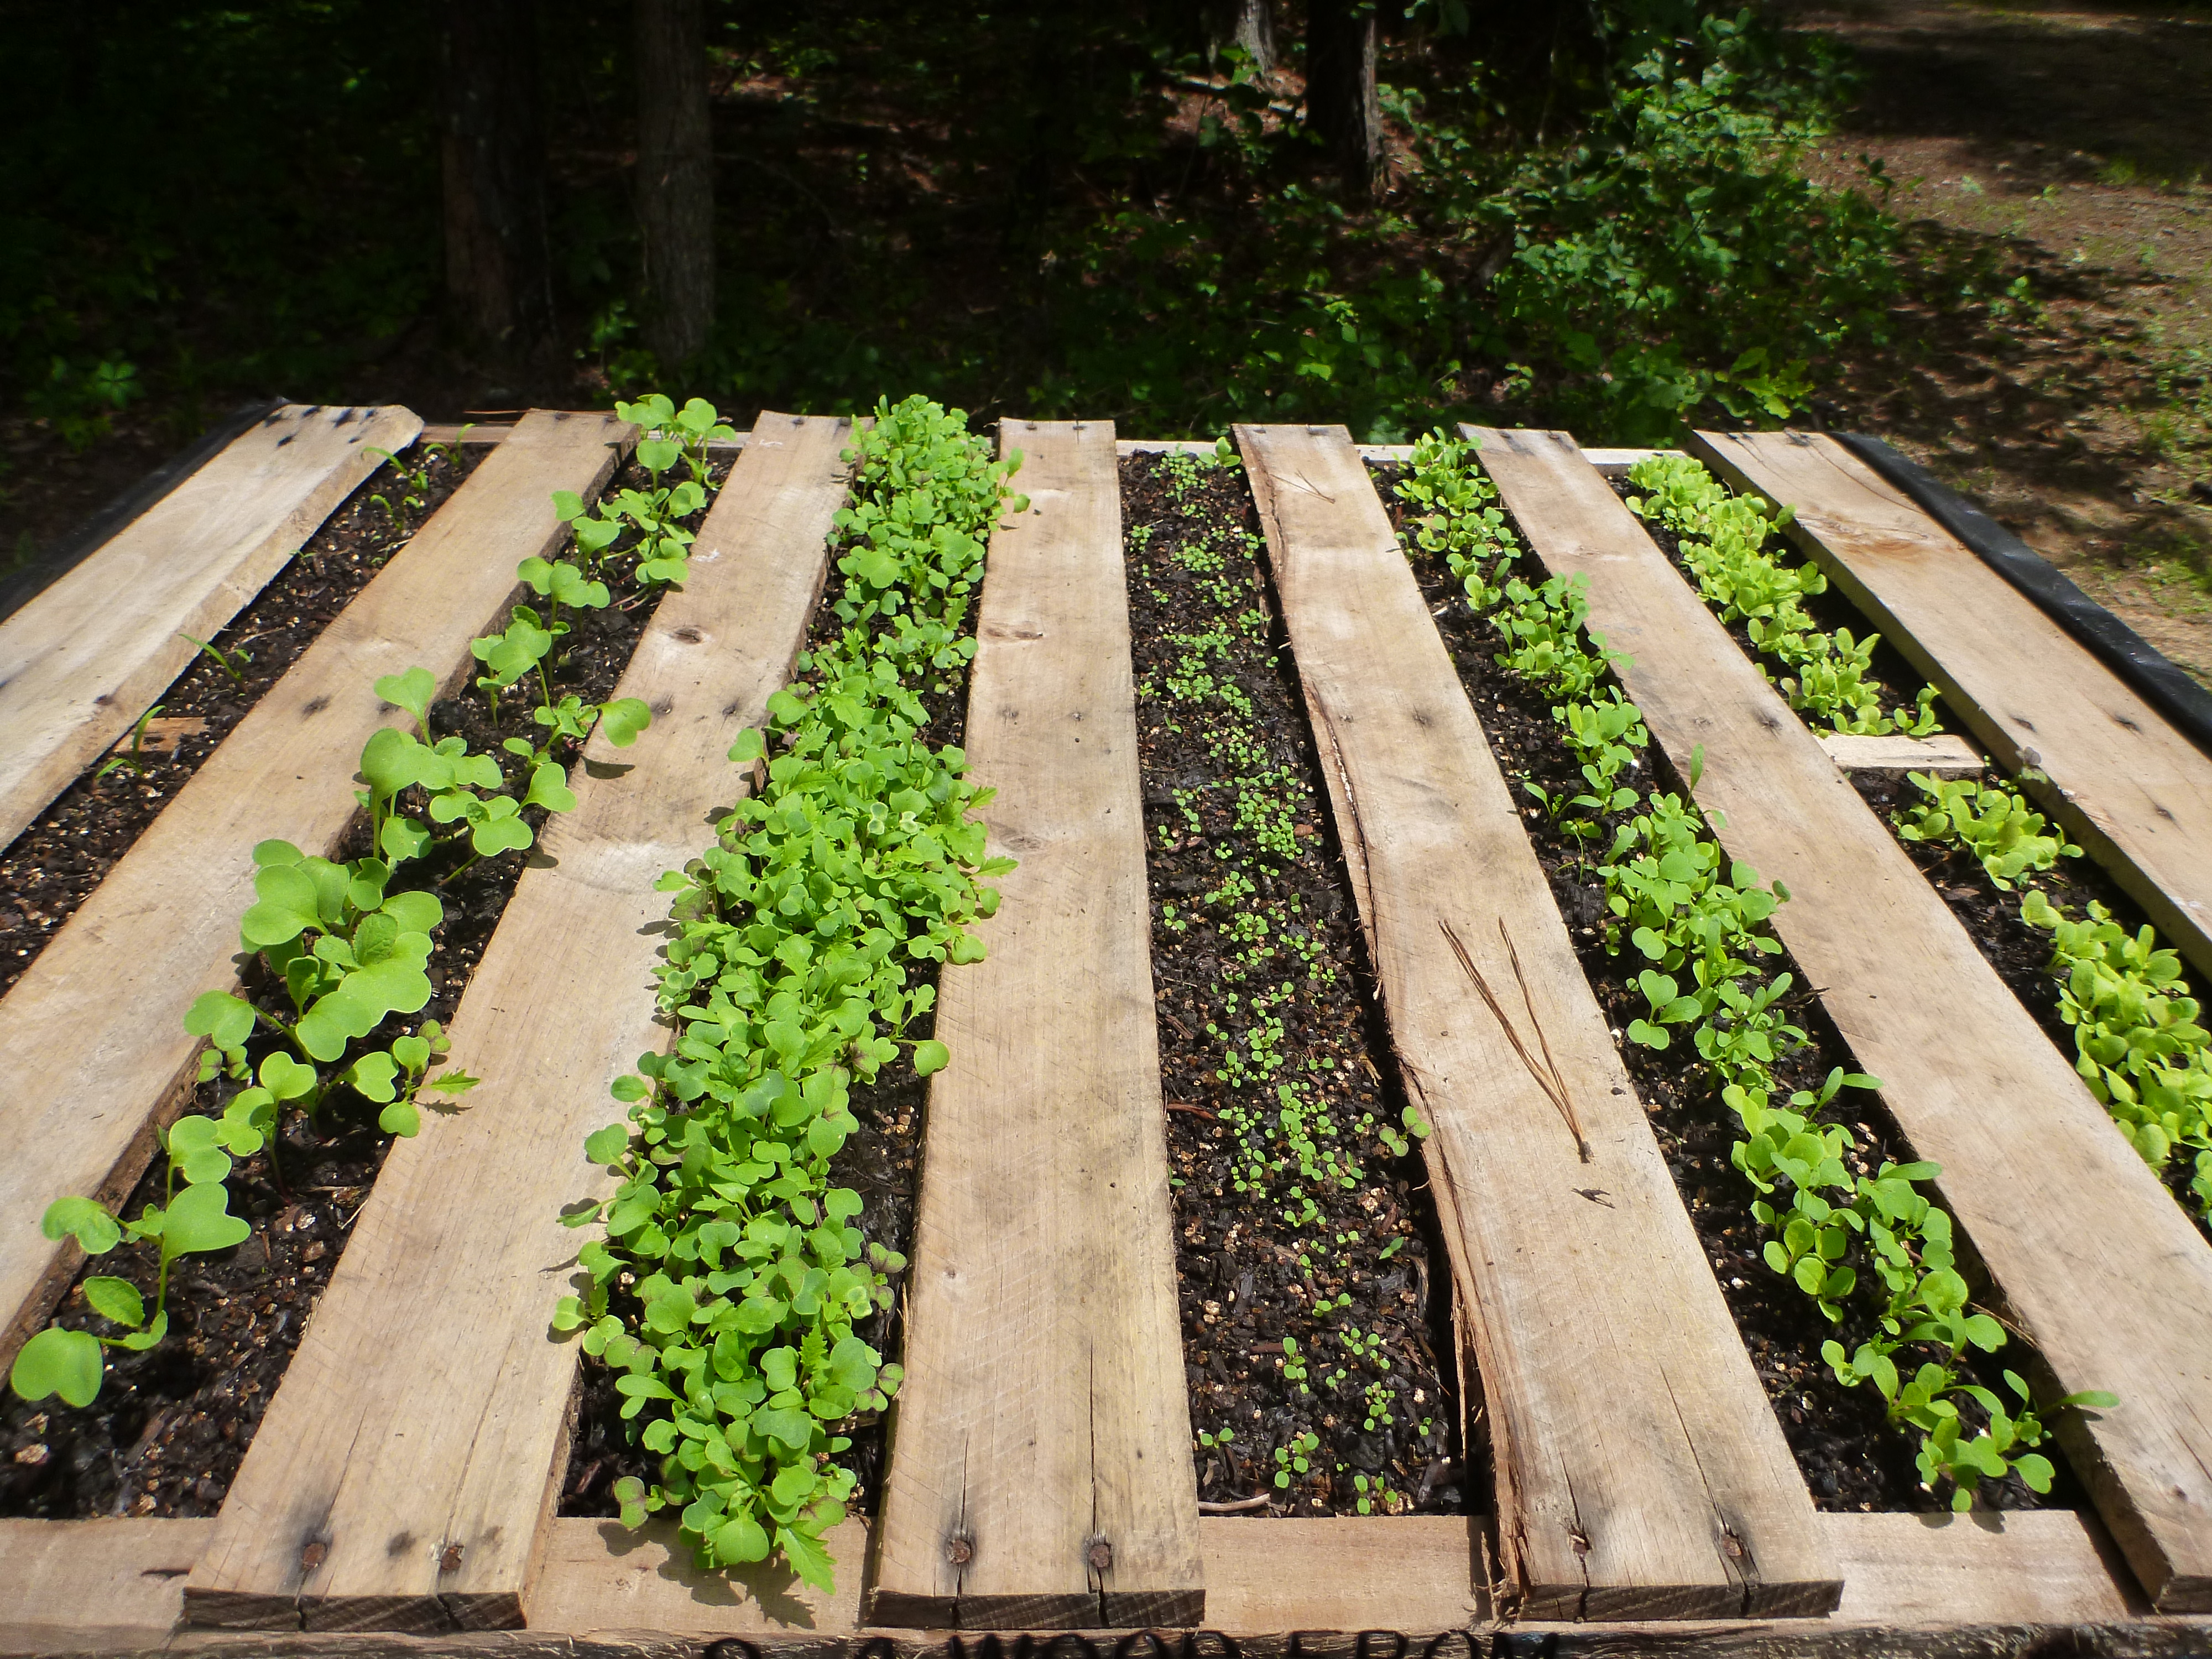
Once the seeds were in the rows I sprinkled a little more soil mix over them and watered the whole thing again. Three days later the first sprouts emerged! Talk about instant gratification! It takes about a month from planting to harvesting a salad which means this pallet will be ready to welcome Gryph when she arrives. I planted a whole row of arugula (I’m madly in love with arugula right now) along with spinach, radishes and three different salad green mixes. My favorite salad green mix right now is from John Scheepers – Torino Italian Misticanza. The pictures below are from this afternoon – a week and a half after planting. The spinach (far left) is slow to germinate – the tiny ones in the middle are the rustic arugula – which are slow to grow, but absolutely worth the wait! We ended up putting three 2″x4″s underneath for support and probably could have used four? You can see how the bottom is sagging but it hasn’t gotten appreciably worse in the past week – it seems to be holding.
If anybody reads this and decides to try it at home I’d Love to hear from you. Especially if you live in another part of the country/world – and/or you grow different things in your pallet – or you come up with improvements on the system – or for any other reason you can conjure. Come Play!
Discover more from Free Range Rodeo
Subscribe to get the latest posts sent to your email.


Sea g Rhydr …. You are amazing!!! It’s beautiful!!! So clear!! Thinking about doing It on the ground! My “St Lee” is busy at work And killing poison ivy but I’m working at it! Have dug up a new area by the mud room door( roto tilled ) divided into squares…. Could put a couple of pallets there… Raining today, so can think a bit! You’re an angel to teach via Blog!!
Sent from my iPhone
>
Just the right height for the horses to graze on.
Looking Good: way more doab